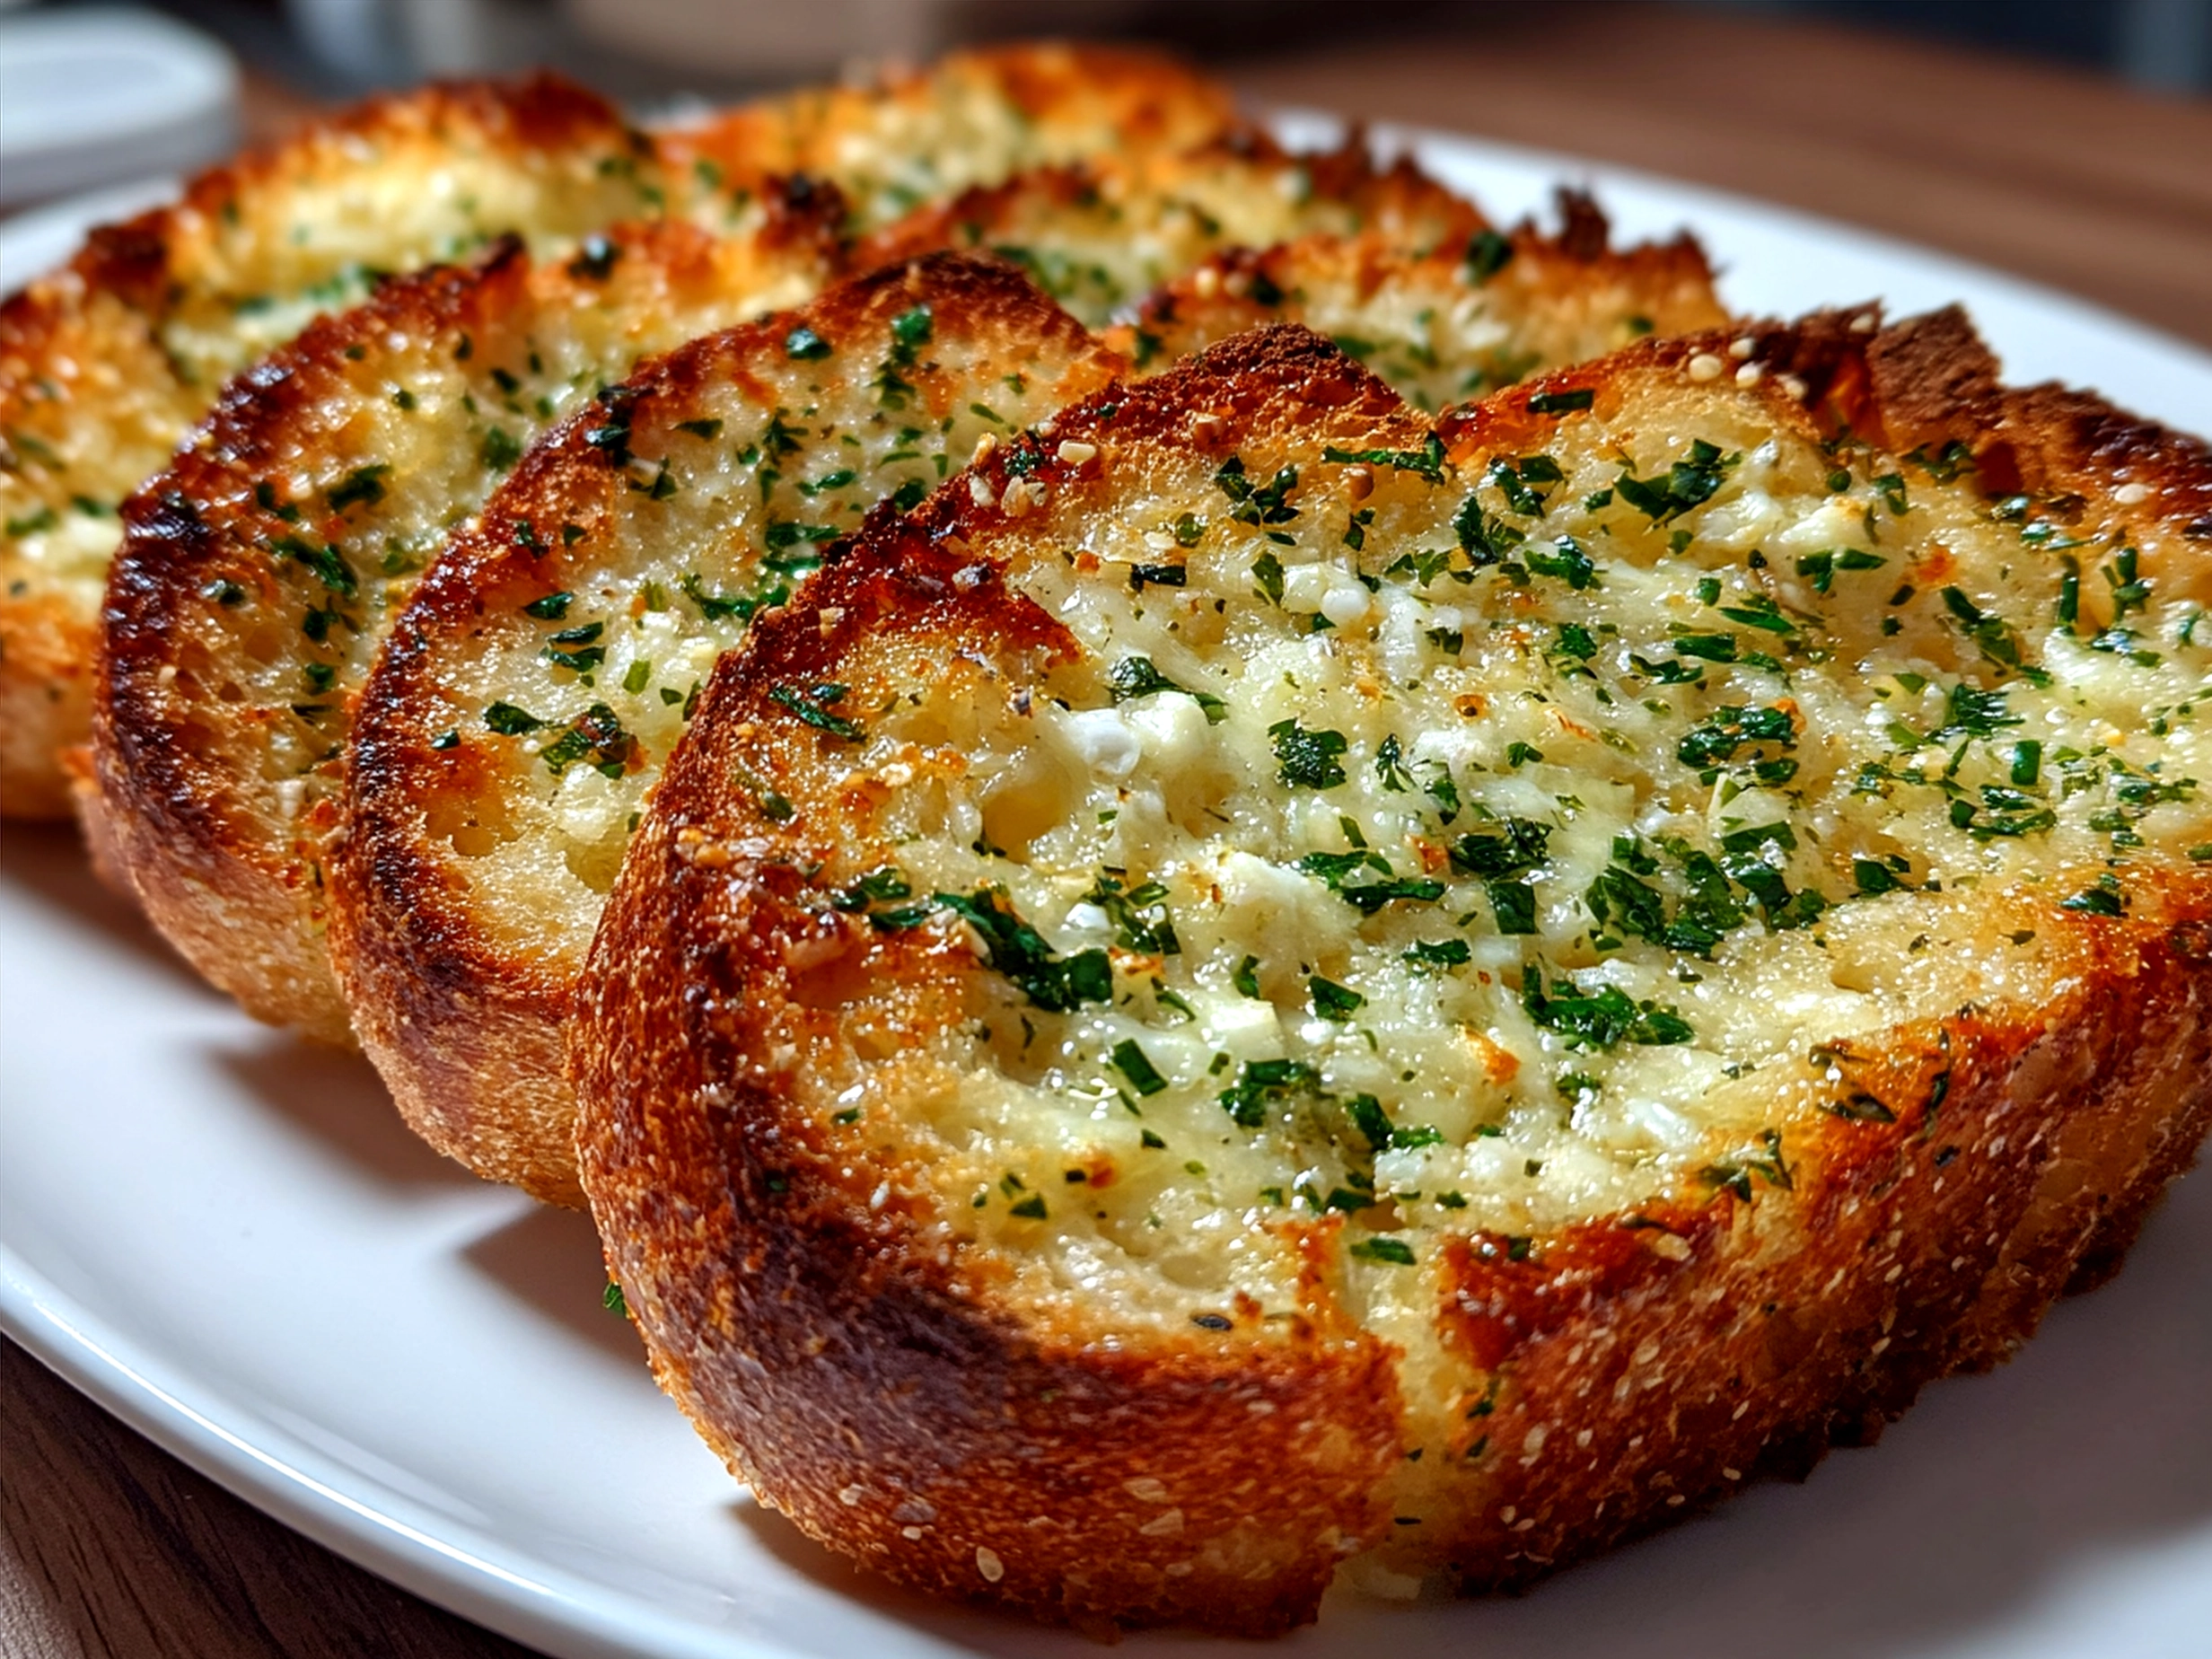
I still remember the first time I made garlic bread from scratch. It was a chilly Friday evening, and I wanted something cozy for my family after a long week. The smell of oven-roasted garlic bread filling the kitchen was nothing short of magical. As I pulled the crispy garlic toast out of the oven, my kids gathered around, noses twitching with anticipation. That buttery garlic bread became an instant hit, and soon it wasn’t just a side dish but the star of our family dinners.
That night, I realized garlic bread wasn’t just a quick fix; it was comfort wrapped in crusty bread and buttery goodness. Since then, it’s become a staple in our home—the perfect side for pasta, soups, or even just snacking on while catching up after a hectic day. What surprised me most was how a simple garlic bread recipe could make everyone pause, smile, and come together. It’s a little thing, but these small food moments mean the world when juggling school runs and work calls.
If you’re looking for a comforting garlic bread solution that’s both simple and satisfying, I’m right here as your fellow busy mom. I want to share everything I’ve learned about making buttery garlic bread that your family will love without overwhelming your kitchen time. Let’s spill the beans on making garlic bread a cozy classic on your table. After all, good food doesn’t need to be complicated to feel like a warm hug at the end of a long day.
INGREDIENTS You’ll Need:
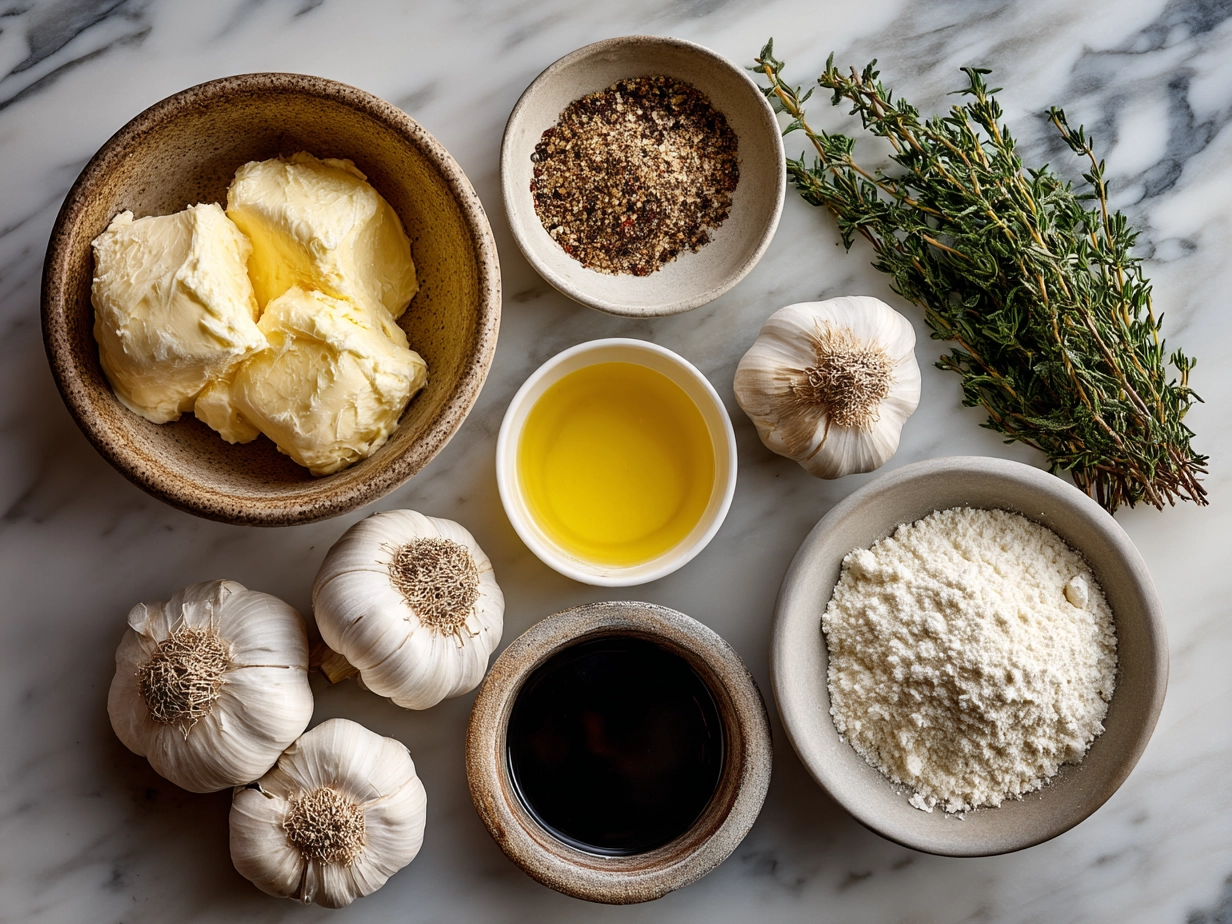
- 1 loaf of French or Italian bread (about 12 inches; a crusty baguette works wonders)
- 1/2 cup (1 stick) unsalted butter, softened – this is the heart of buttery garlic bread!
- 4 large garlic cloves, minced (or more if your family loves bold flavors)
- 2 tablespoons fresh parsley, finely chopped (adds a fresh burst of color and taste)
- 1/4 teaspoon salt (balances out all the buttery goodness)
- 1/4 cup grated Parmesan cheese (optional, but my family begs for it!)
No worries if you don’t have fresh parsley; dried Italian seasoning or even a sprinkle of chives will bring extra comfort to your garlic bread. You can find these simple ingredients at your regular grocery store and, trust me, this garlic bread proves delicious doesn’t mean expensive.
For busy days, I often use pre-minced garlic from the jar. It’s a little shortcut I found saves me time without sacrificing much flavor. My family gets extra comfort when I add a pinch of red pepper flakes for a gentle zing. It’s a small change but makes our garlic bread a bit more special, especially for the grown-ups.
If you’re feeling adventurous, I highly recommend trying herb garlic focaccia as a twist on your garlic bread cravings—you can find an amazing recipe there.
This list keeps things simple but gives you plenty of room to tweak and make the garlic bread your family’s go-to comfort food.
Let’s Make it Happen!
- Preheat your oven to 375°F. This is perfect for getting that crispy garlic toast without drying it out.
- Cut the bread in half lengthwise. If you want smaller pieces for little hands, slice after preparing the garlic bread.
- Mix your softened butter with minced garlic, chopped parsley, salt, and Parmesan. This flavorful butter blend is the secret to our garlic bread magic.
- Spread the butter mixture evenly on each bread half. Make sure not to skimp here. The richness of the buttery garlic bread depends on it!
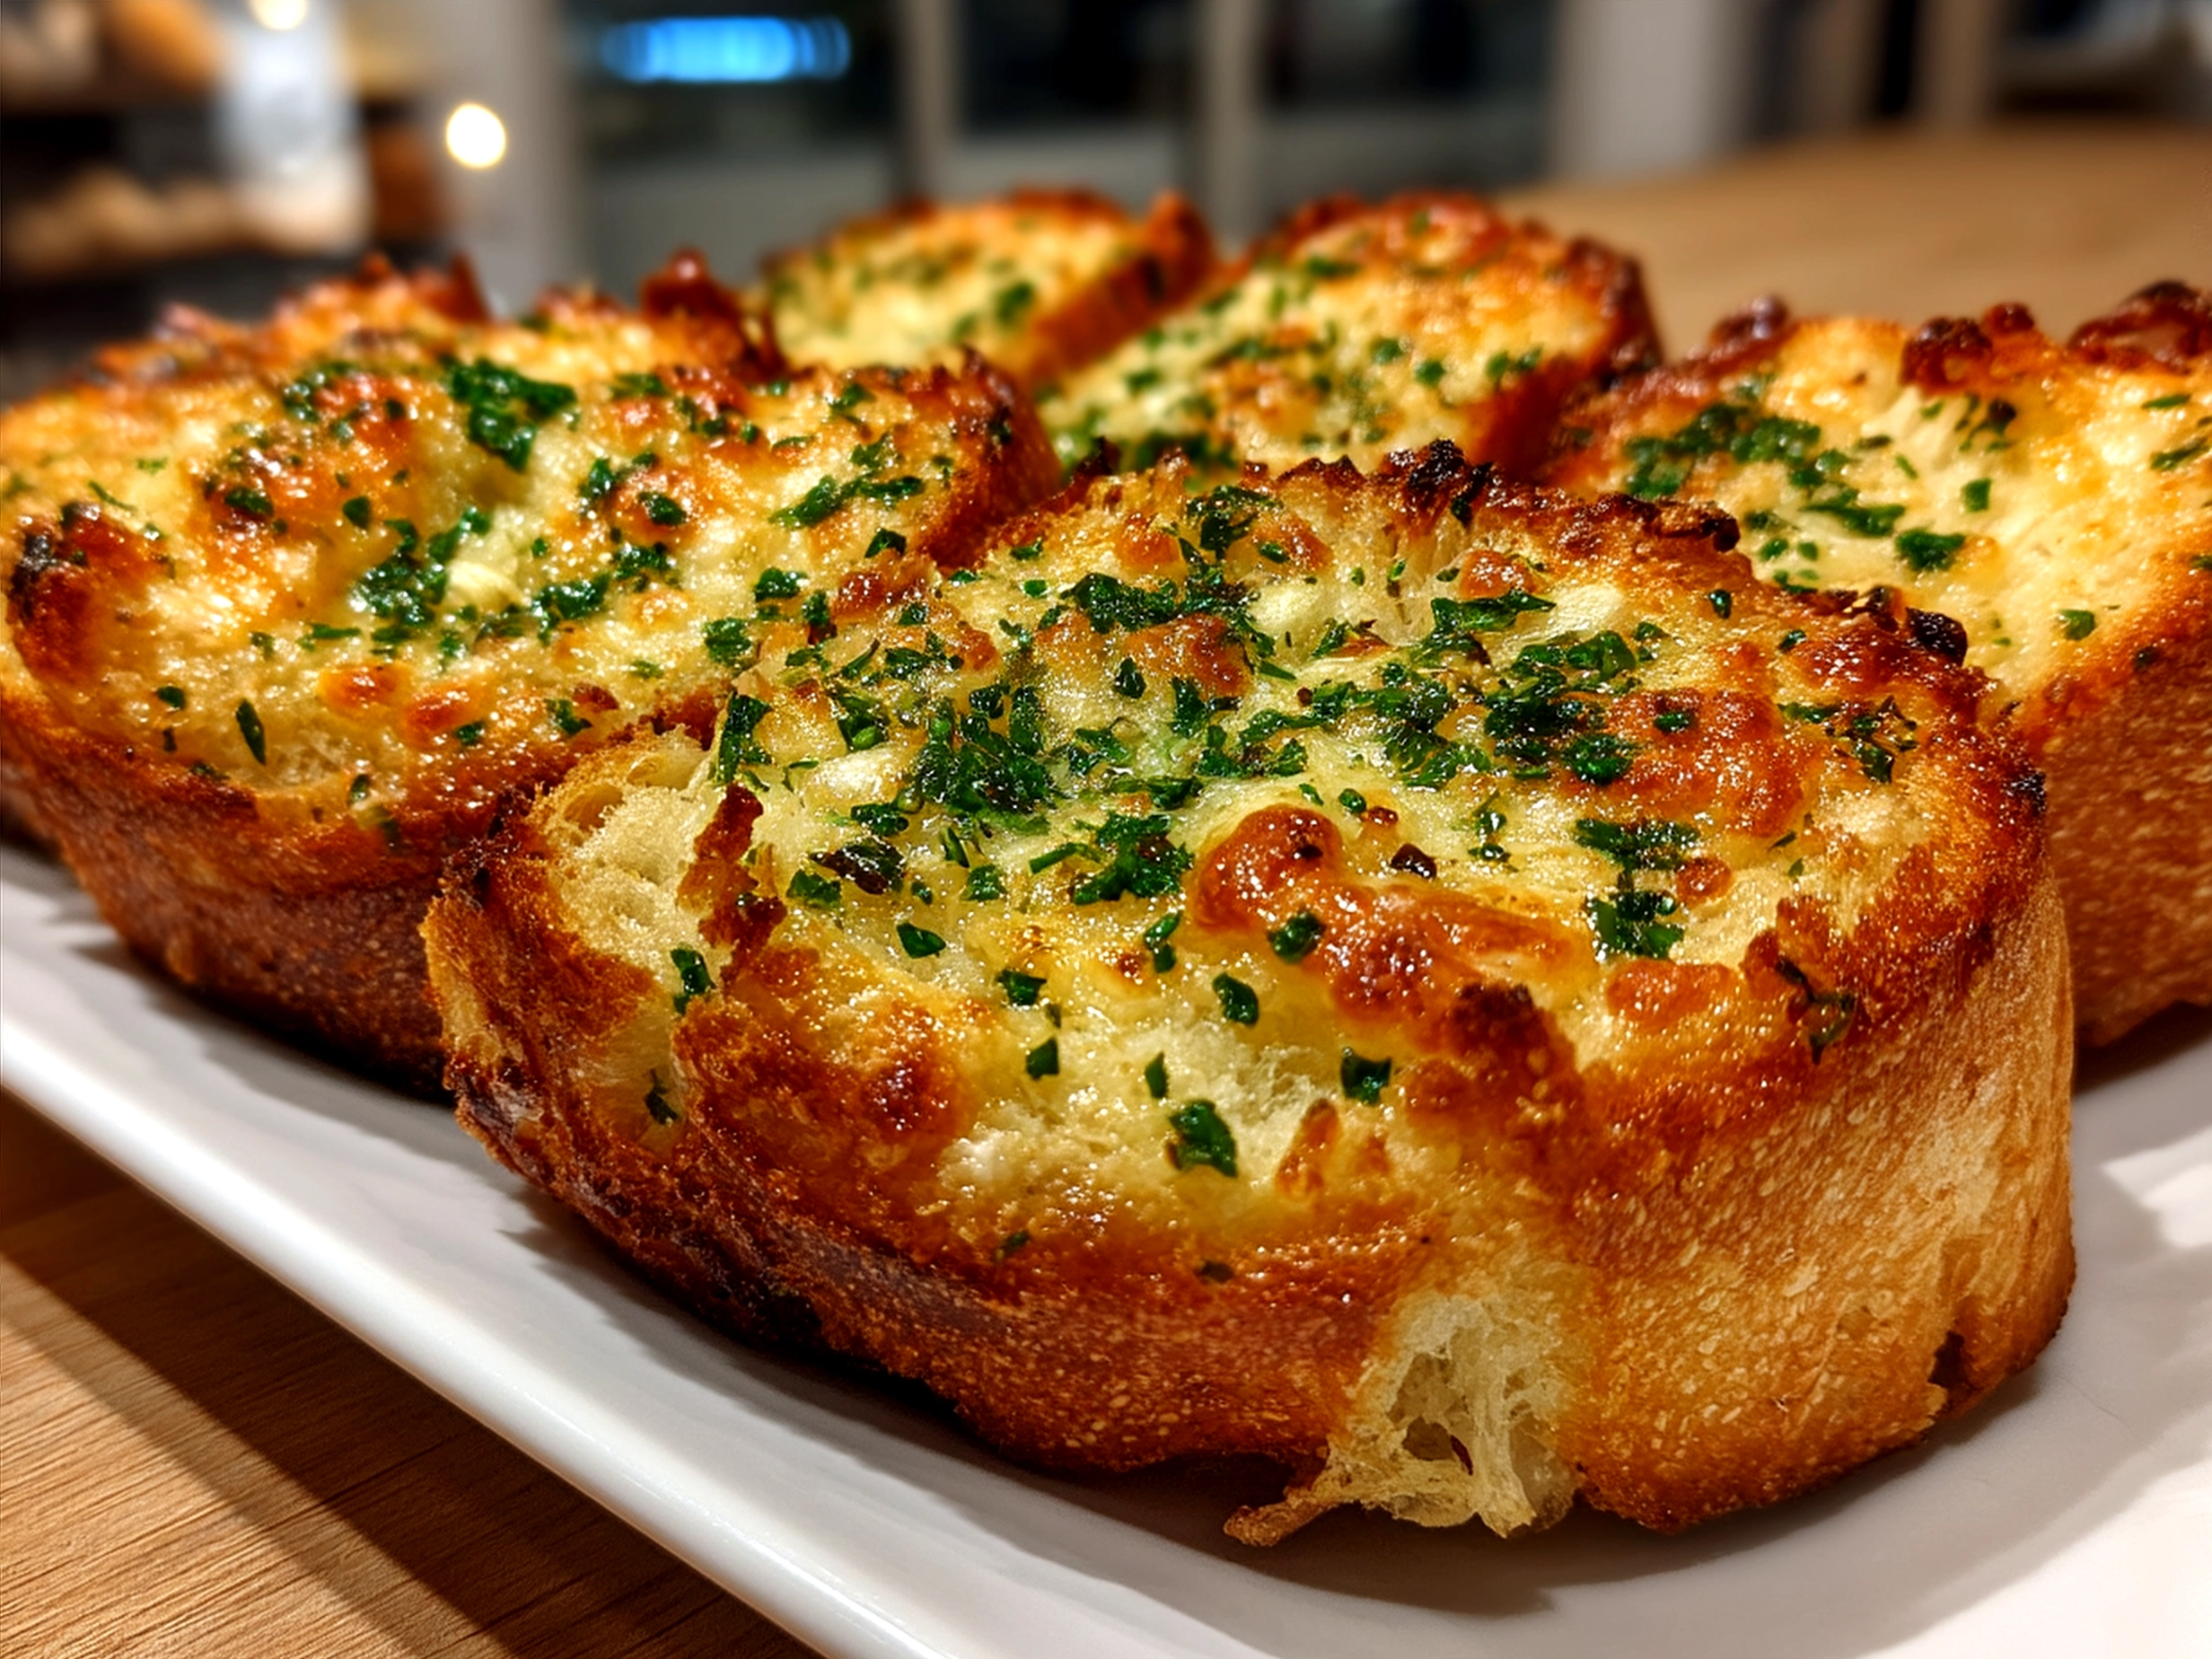
- Place the bread on a baking sheet, buttered side up, and pop it into the oven. Here’s a comfort hack: bake for 10-12 minutes for warm, soft garlic bread or 15-18 minutes for crispy garlic toast perfection.
- Keep an eye on it because ovens vary, and no one wants burnt garlic bread. Your kitchen will smell amazing by now, and that’s your cue it’s almost ready!
- Optional step: Switch to the broil setting for 1-2 minutes at the end to get a golden, bubbly top. Watch it closely!
- Slice and serve immediately. If your garlic bread looks a little uneven, don’t worry—that’s homemade charm.
In my busy kitchen, this comforting garlic bread usually takes about 20 minutes from start to finish, including prep. While it’s baking, I like to prep the next day’s school lunch or tidy up the dinner mess. No wasted minutes, just moments of creating comfort for my family!
If you’re curious about a fun variation, check out this garlic bread wreath with baked brie we love around here. It’s a showstopper on special nights.
How We Love to Eat This!
At our house, garlic bread is a mood lifter. The kids devour this comforting garlic bread when I serve it alongside creamy tomato soup or a big salad loaded with their favorite toppings. The butter and garlic combo feels indulgent but wholesome enough for a quick family dinner.
On busy weeknights, I reach for oven roasted garlic bread because the crispy garlic toast version pairs beautifully with easy meals like garlic cheddar potato soup or a simple pasta bowl. Presentation is everything to my little ones, so I add a sprinkle of fresh parsley on top—it makes it look like I’ve put in more effort than I actually did!
Leftovers? Oh, we always have them, and that’s a win in itself! I toast slices the next day for a crunchy snack or make a garlic bread pizza inspired by a fun idea from the Gozney community on Facebook. Just butter, crushed garlic, and toppings, and you’re golden.
Seasonal variations I love include switching from parsley to fresh basil in summer or mixing in herbs from the garden for an herb garlic focaccia twist. These small swaps keep garlic bread feeling fresh and exciting without creating extra work.
Plus, guests always ask for seconds when flavors like crispy garlic toast accompany our meals. It’s amazing how this simple side can bring everyone closer at the table.
FAQs: Your Questions Answered
Is this garlic bread filling enough for growing kids?
Absolutely! The buttery garlic bread feels indulgent but also has enough carbs and fat to keep little tummies satisfied. Pair it with a protein or veggie, and it’s a complete meal in itself.
What if my picky eater won’t try this garlic bread?
Try making it a fun experience by letting them help spread the butter mixture. Sometimes, kids are more inclined to eat what they helped create. Also, milder versions without herbs worked wonders for my pickiest eater early on.
Can I meal prep this garlic bread for busy weeks ahead?
Yes! You can prep and assemble the garlic bread up to a day in advance and keep it covered in the fridge. When ready, just pop it in the oven and enjoy fresh, oven roasted garlic bread any day.
Can I use garlic powder instead of fresh garlic?
While fresh garlic gives the best flavor, garlic powder is a decent substitute if you’re in a pinch. Just reduce the amount to about half a teaspoon and adjust to taste.
What kind of bread works best?
French or Italian bread is ideal, but you can also try a rustic sourdough. For a soft option, brioche bread can make the garlic bread extra rich.
How do I make garlic bread crispier?
Baking longer at a slightly higher temperature or finishing with a quick broil gives you that crispy garlic toast everyone loves. Just watch it closely to avoid burning.
Any recommendations for variations?
Oh yes! Beyond herb garlic focaccia, try adding cheese like mozzarella on top for a melty version, or sprinkle some red pepper flakes for a spicy kick. For more ideas and community inspiration, check out this garlic bread advice thread on Reddit.
Final Thoughts:
Garlic bread has become a cornerstone of comfort food in my family. It supports our goal of keeping dinners simple but satisfying when life feels like a whirlwind. My garlic bread comfort hacks include using softened butter mixed well with plenty of fresh garlic, spreading thickly for maximum buttery garlic bread flavor, and always baking until I have that perfect crispy garlic toast crust.
We’ve tried plenty of variations: my kids favor the classic buttery garlic bread, my husband loves the herb garlic focaccia twist, and I appreciate a cheesy oven roasted garlic bread on cozy nights. I hope you find joy in tweaking these recipes to fit your family’s tastes.
If you want to spice things up, you might enjoy a garlic bread version paired with roasted garlic potato soup—another comforting classic from our kitchen to yours!
Remember, this garlic bread is your comforting companion in the cozy chaos of family meals. Make it your own way, with love and just the right amount of buttery garlic bread to brighten your day. Cooking doesn’t need to be complicated, and I can’t wait for your family to feel the warmth this simple recipe brings. You got this, fellow comfort seekers!
Garlic Bread

Garlic Bread is a classic Italian-inspired side made by toasting bread with a flavorful mixture of garlic, butter, and herbs for a warm, crispy treat.
- Prep Time: 10 minutes
- Cook Time: 12 minutes
- Total Time: 22 minutes
- Yield: 6 servings
- Category: Dinner
- Method: Baked
- Cuisine: Italian
Ingredients
- 1 baguette or Italian bread loaf
- 1/2 cup unsalted butter, softened
- 4 cloves garlic, minced
- 2 tbsp fresh parsley, chopped
- 1/2 tsp salt
- 1/4 tsp black pepper
- Optional: 1/4 cup grated Parmesan cheese
Instructions
- Preheat oven to 375°F (190°C).
- Slice the bread loaf in half lengthwise.
- In a bowl, mix softened butter, minced garlic, chopped parsley, salt, and pepper until well combined.
- Spread the garlic butter mixture evenly over the cut sides of the bread.
- If desired, sprinkle grated Parmesan cheese over the buttered bread for extra flavor.
- Place the bread halves on a baking sheet, cut side up.
- Bake for 10-12 minutes until the bread is golden and crispy on the edges.
- Optional: For a crispier top, broil for an additional 1-2 minutes, watching carefully to avoid burning.
- Remove from oven, slice, and serve warm.
Notes
For a richer flavor, add a sprinkle of mozzarella cheese before baking or serve with marinara sauce for dipping.