I still remember the first time I tried making Date Brownies. It was one of those chaotic afternoons when dinner ideas felt like mountains, and I needed a little magic to keep everyone happy. I stumbled across a recipe online, and honestly, I wasn’t sure if my kids would go for a treat that used dates instead of the usual sugar. But from the moment they took their first bites, it felt like a cozy hug for all of us. These Date Brownies brought a kind of comfort that went beyond the sweet richness — it was the warmth of sharing something wholesome after a busy day.
Making Date Brownies has since become part of my cooking rhythm. They’re simple enough to whip up during school lunches prep or as a last-minute after-school snack. And these brownies have this quiet way of comforting my family, wrapping everyone up in that healthy date dessert goodness while keeping things simple for me. Over time, I learned a few tricks about the flavors and textures that make these gluten-free date brownies a true family favorite. Like adding a pinch more cinnamon or using date paste brownies batter for that perfect sticky date brownie recipe I now rely on when mornings get hectic.
If you’re a fellow comfort seeker juggling a never-ending to-do list and wishing for delicious but doable family treats, you’ve found a friend here. Together, let’s make mealtimes a little less overwhelming with Date Brownies that bring genuine warmth to your table. I can’t wait to share how these simple brownies fit right into our family’s cozy chaos.
INGREDIENTS You’ll Need:
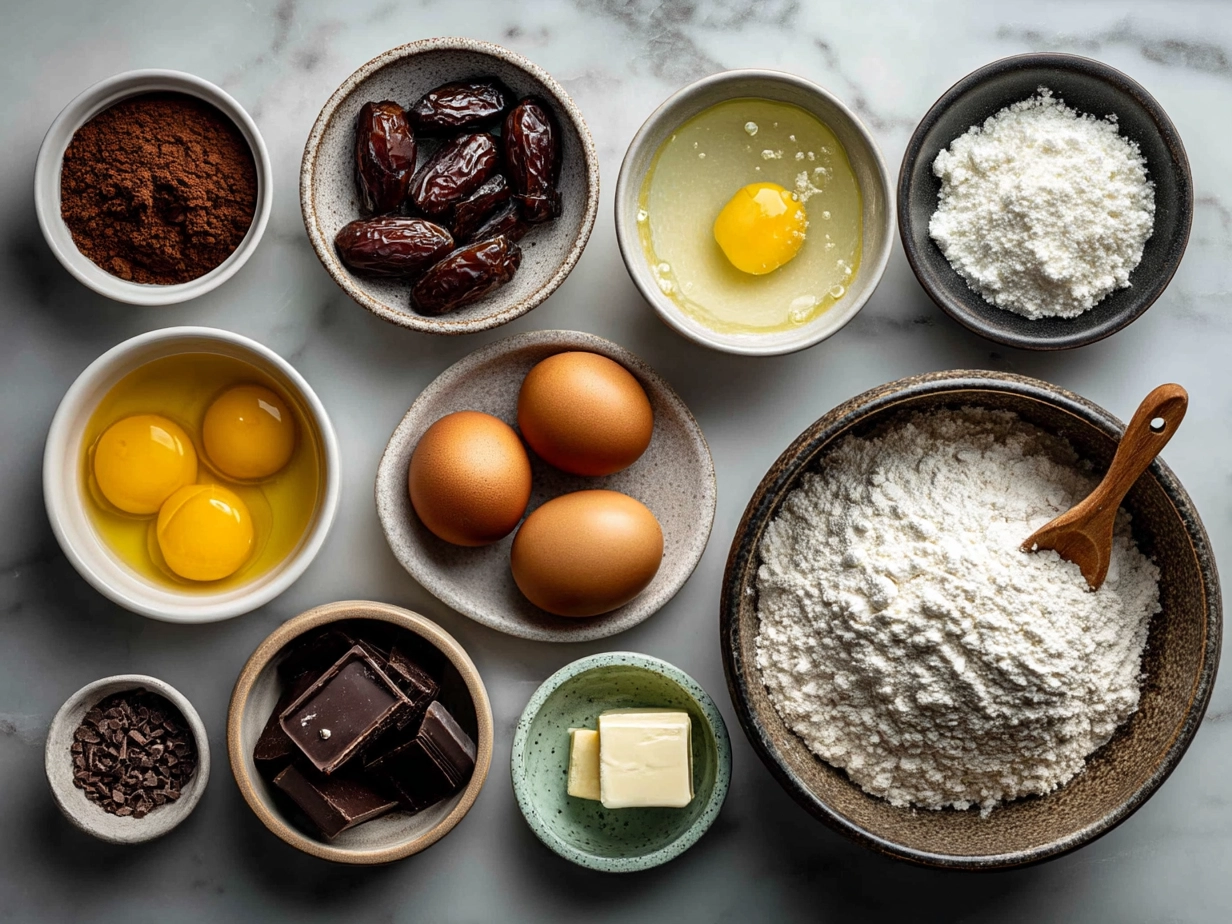
1 ½ cups pitted dates (Medjool work wonders here; swap with dried or soaked dates if fresh ones aren’t handy)
½ cup whole wheat flour (or gluten-free all-purpose flour for gluten-free date brownies)
¼ cup almond meal (feel free to skip or replace with extra flour)
⅓ cup cocoa powder (unsweetened for that chocolatey comfort)
1 teaspoon baking soda
½ teaspoon salt
1 teaspoon cinnamon (optional but adds a lovely warm note)
¼ cup melted coconut oil (olive oil works as a budget-friendly swap)
½ cup unsweetened applesauce (natural sweetness plus moisture)
1 teaspoon vanilla extract
You can find these simple ingredients at your regular grocery store or health food shop. Trust me, this Date Brownies ingredient list is simple because busy moms need comfort without complexity! I always keep some dates, cocoa, and flour handy so my sticky date brownie recipe is ready on a whim.
My family gets extra comfort when I add a handful of chopped walnuts or chocolate chips for a texture surprise. No worries if you don’t have almond meal — this Date Brownies still shines without it. Here’s a little comfort hack: if you’re tight on time, use pre-made date paste brownies mix (yes, those are a thing!) for a shortcut that holds up beautifully.
Let’s Make it Happen!
1. Preheat your oven to 350°F (175°C) and grease or line an 8×8-inch pan. I find prepping my baking pan right away sets the stage for smooth cooking days.
2. Blend the dates into a paste. Toss them in a food processor or blender and pulse with 2-3 tablespoons of water until smooth. This creates that sticky date brownie base I love. In busy kitchens, this step doubles as a quick playtime for toddlers nearby!
3. In a large bowl, whisk together the dry ingredients — flour, almond meal, cocoa powder, baking soda, salt, and cinnamon. I used to mix these right away and sometimes missed a pinch of salt; having it all measured upfront saves me stress.
4. Combine wet ingredients in another bowl: the melted coconut oil, applesauce, vanilla extract, and date paste. Pour the wet mix into the dry and stir until just combined. You’ll want a thick but spreadable batter for these Date Brownies.
5. Pour the batter into your prepared pan and smooth it evenly. This is a perfect time to involve the kids; they love the sticky texture of this date paste brownies batter!
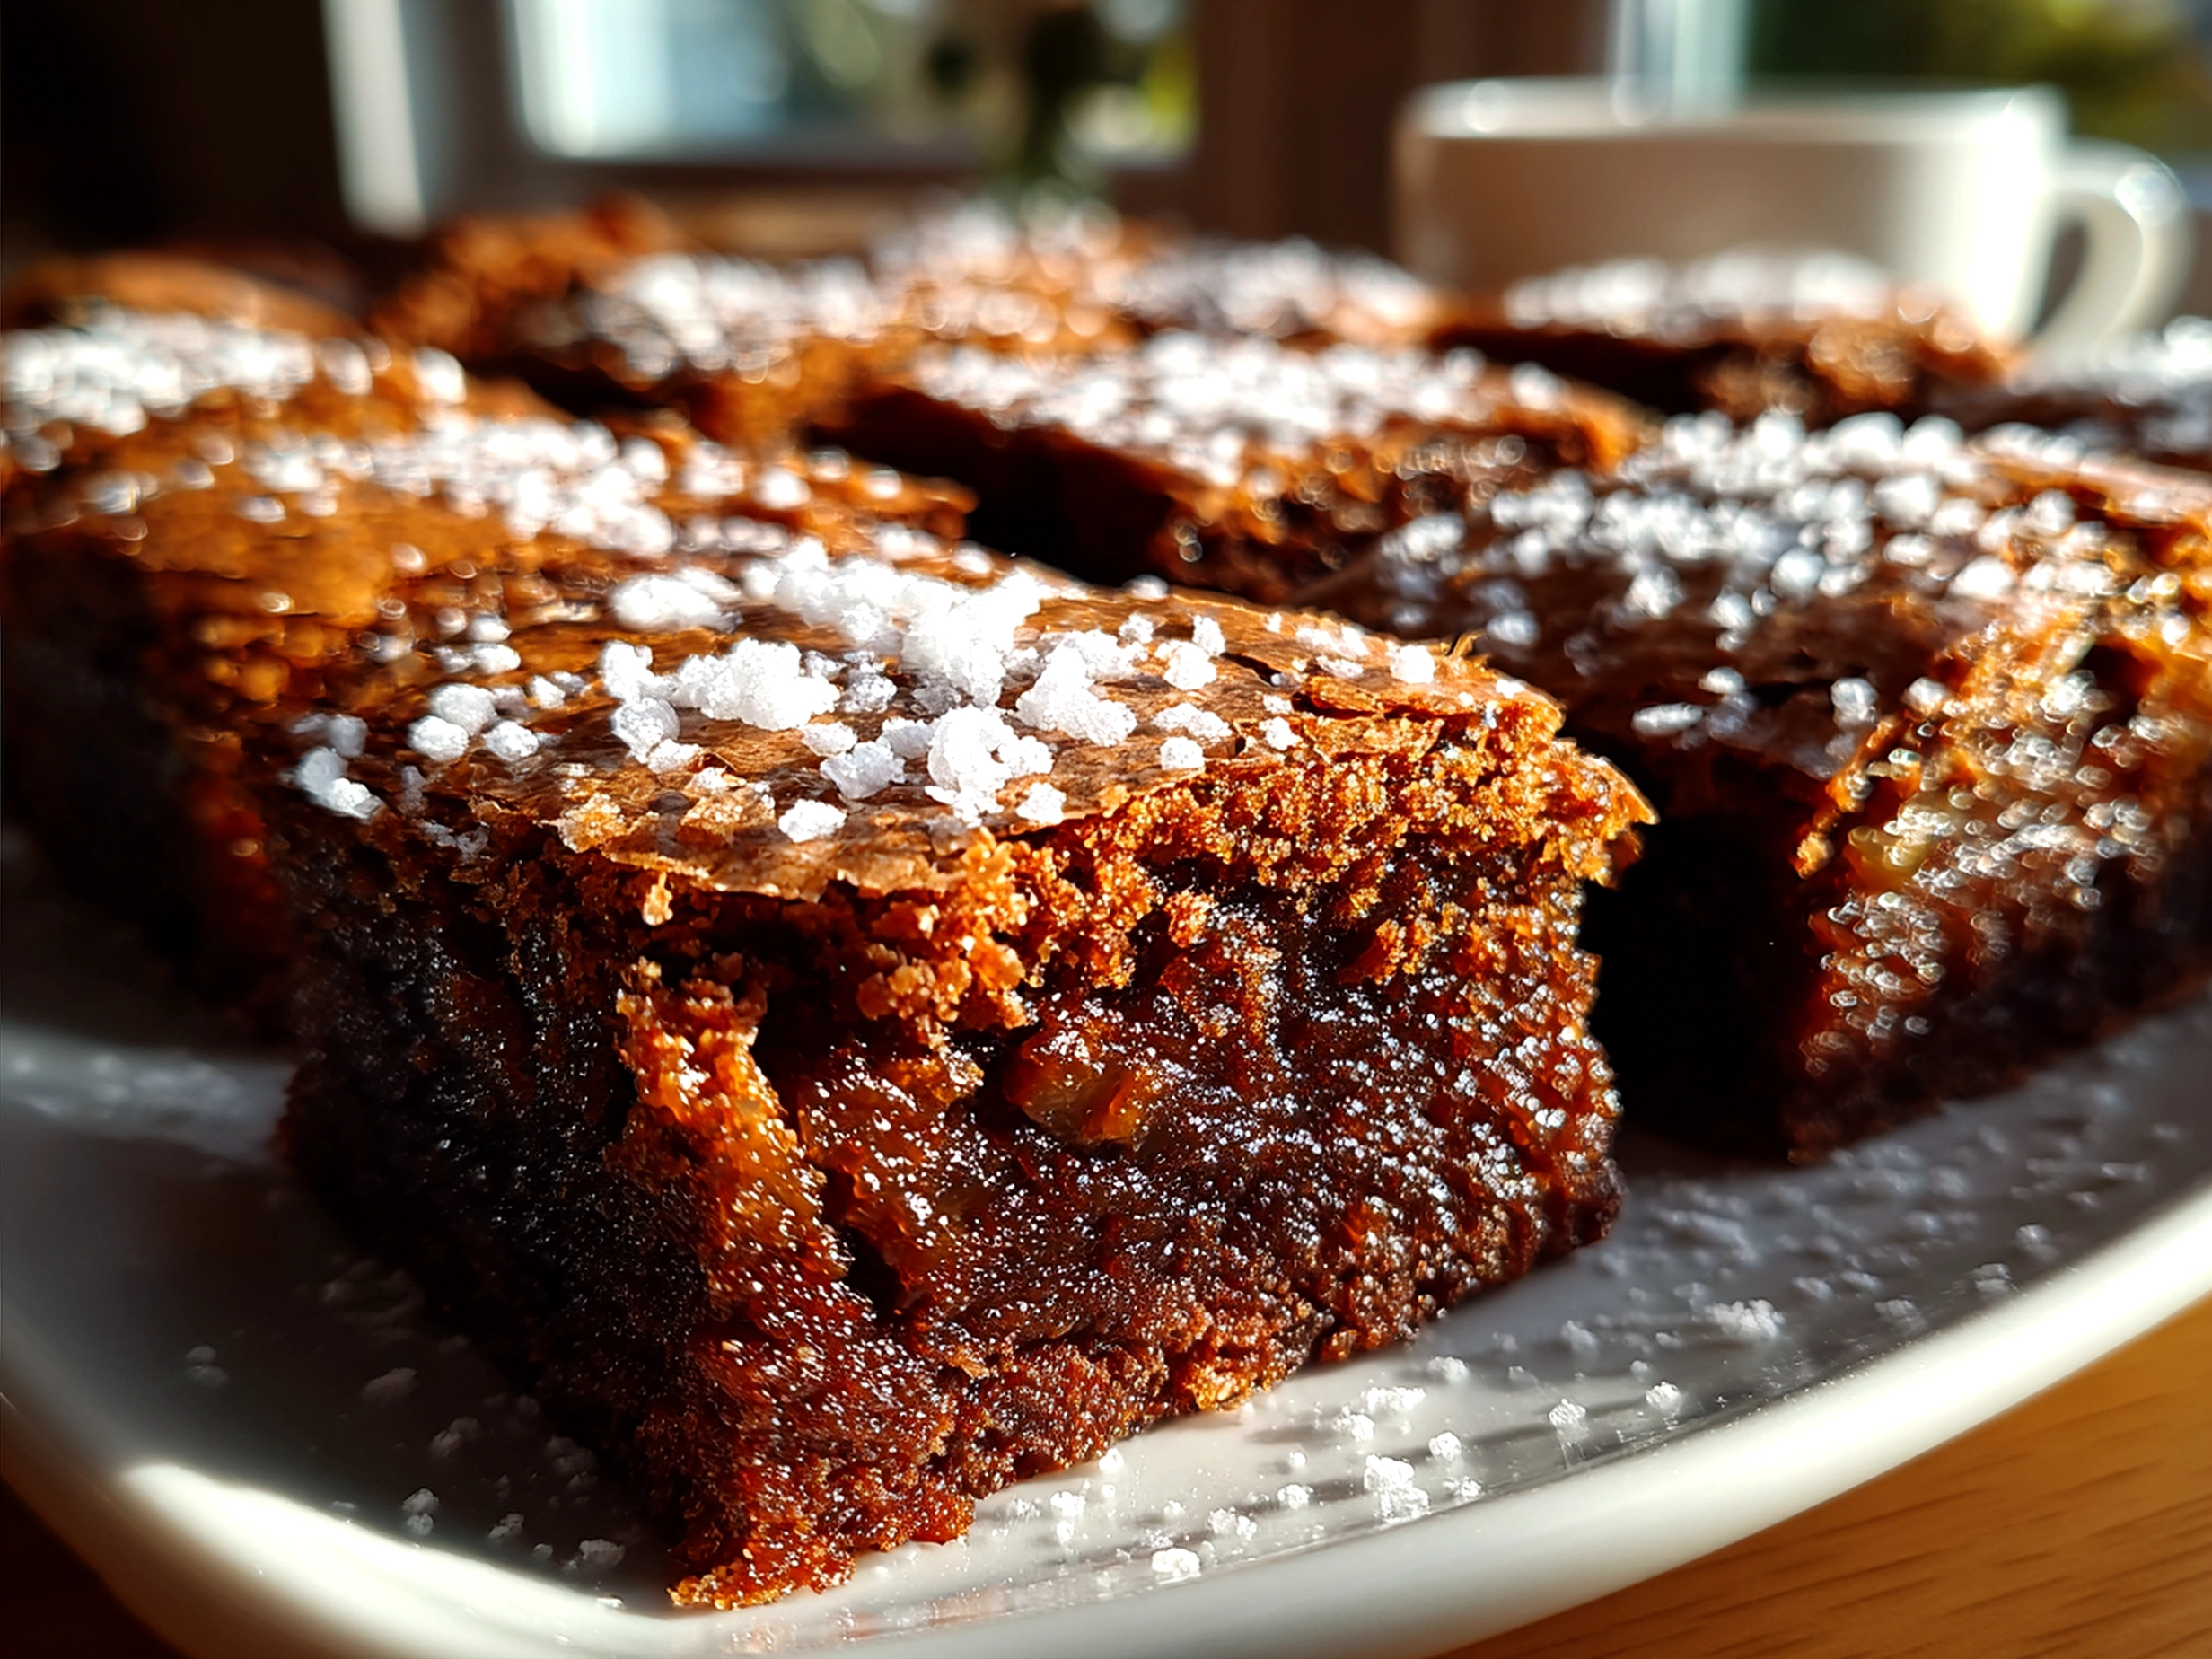
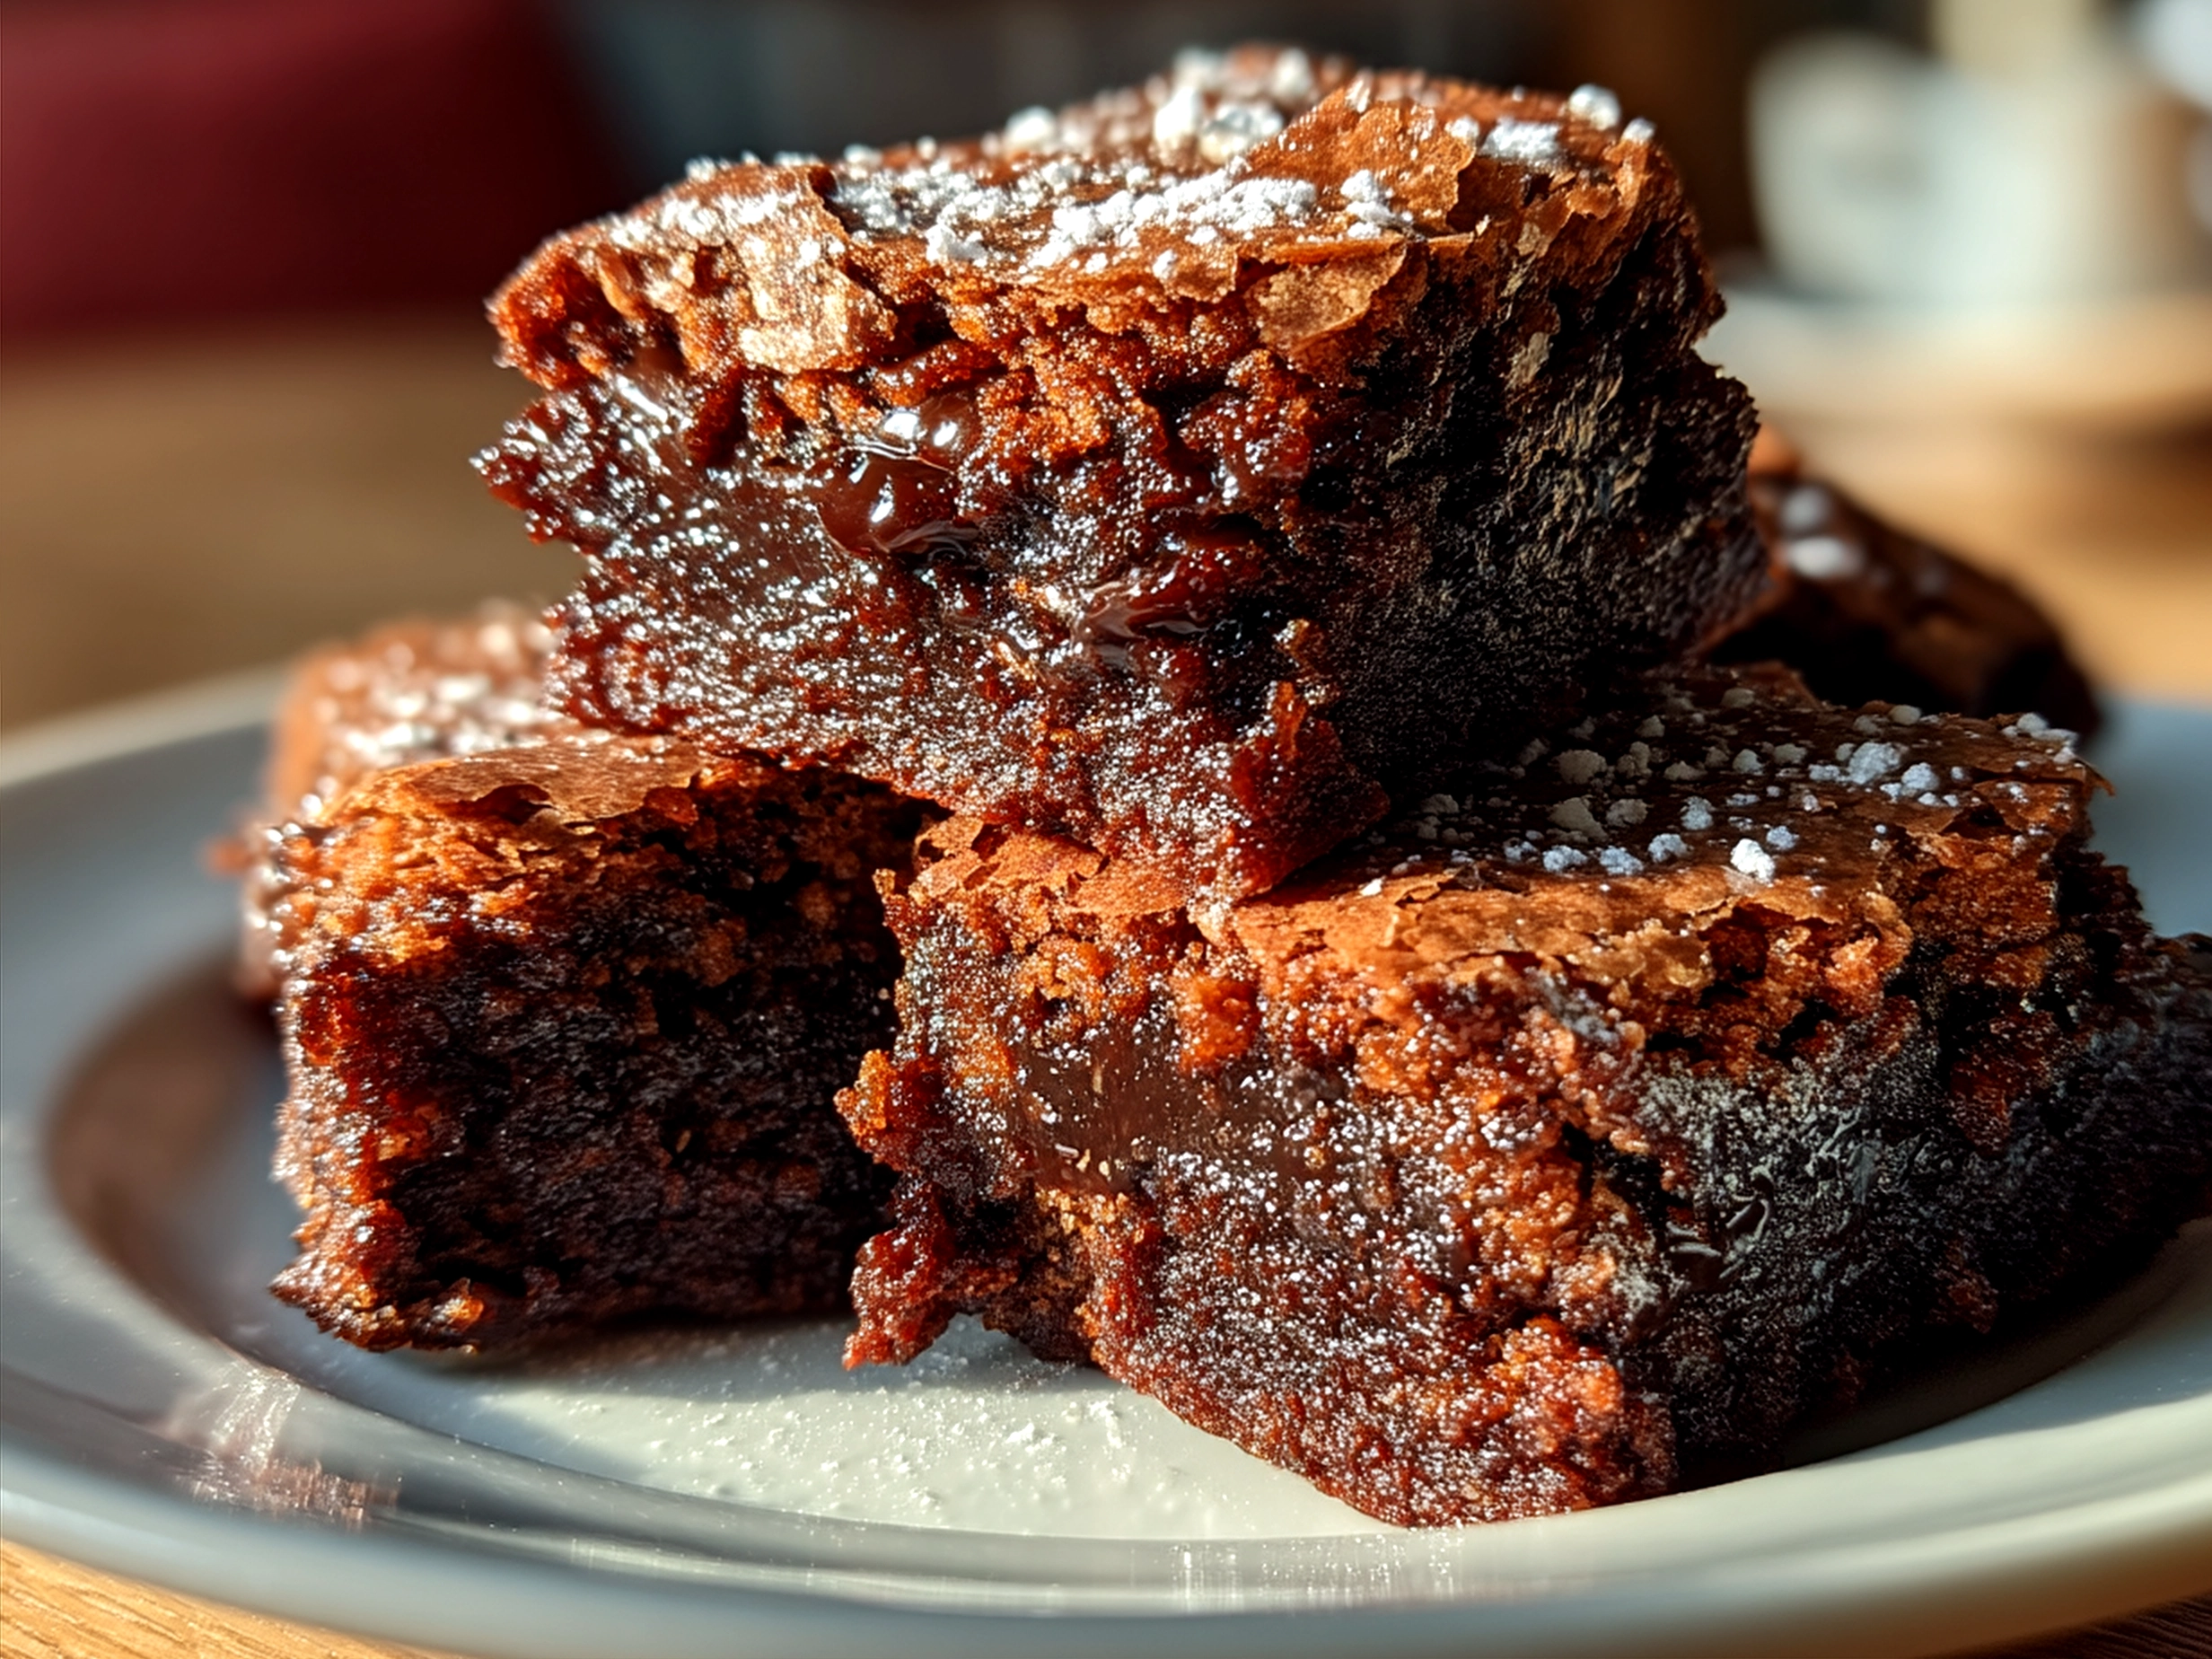
6. Bake for 25-30 minutes. Keep an eye on your Date Brownies at the 25-minute mark; a toothpick inserted should come out with moist crumbs, not wet batter. Don’t worry if your Date Brownies look a little gooey — that’s their charm. They firm up as they cool, giving you that chewy, comforting bite.
7. Let the brownies cool completely before slicing. While you wait, perfect time to prep tomorrow’s lunch or catch a breather. Your kitchen will smell amazing by now — I find this moment alone feels like a little reward.
If you need some inspiration for extra gooey vegan date brownies versions or want to see a silky no-bake twist, this vegan no-bake brownies with dates and nuts recipe might be a fun next try!
How We Love to Eat This!
Our favorite way to enjoy these Date Brownies is as a cozy after-school snack. Paired with a simple homemade yogurt dip or almond butter, it satisfies without feeling like a sugar overload. The kids devour this comforting Date Brownies especially when I serve it with fresh fruit on the side — it balances sweetness and keeps everyone happy.
These brownies also shine during busy weeknights when we crave something quick and nurturing. I’ve served this sticky date brownie recipe at family gatherings and received such smiles it became an instant conversation starter. For a bit of fun, I sometimes sprinkle a light dusting of powdered sugar or drizzle melted peanut butter over the top for extra coziness.
Leftovers? They freeze really well in slices. Wrapped up, they become easy grab-and-go treats for lunchboxes or quick breakfast bites, saving the day when life gets crazy. If you want to switch it up seasonally, adding pumpkin puree or swapping cinnamon for ginger creates a warm, autumnal version we’ve loved during cooler months.
You might also enjoy checking out this loaded cream cheese Halloween brownies for when you want something festive or the halloween swirl oreo cream cheese brownies for playful dessert variety.
FAQs: Your Questions Answered
Is this Date Brownies really filling enough for growing kids?
Absolutely! The combination of dates, whole grains, and a bit of healthy fat gives sustained energy. My kids head into homework or playtime fueled and satisfied.
What if my picky eater won’t try this Date Brownies?
Try adding a little extra cocoa or a handful of chocolate chips — those familiar chocolate vibes sometimes help. Another trick is pairing it with their favorite dip or topping.
Can I meal prep this Date Brownies for busy weeks ahead?
Yes! These brownies freeze beautifully. Slice and store in airtight containers or bags. They thaw quickly and stay moist, making them perfect for quick family lunches.
Are these Date Brownies vegan or gluten-free?
They can be both! Use gluten-free flour to make gluten-free date brownies and swap applesauce or coconut oil to keep it vegan date brownies style. A lovely healthy date dessert for many dietary needs.
How do I make my Date Brownies extra sticky like in a sticky date brownie recipe?
The magic comes from the date paste and applesauce moisture. Don’t overbake — pulling them out when slightly underdone keeps that signature sticky texture.
Where did you find inspiration for this recipe?
I first saw a delicious fudgy flourless date brownies idea on Healthy Little Vittles and adapted it to fit our comfort food goals.
Are there other easy versions of Date Brownies?
Yes! You can find no-added sugar, no gluten options — check out The Conscious Plant Kitchen’s Date Brownies for inspiration. Also love this easy date-sweetened vegan brownies recipe for a quick swap.
Final Thoughts:
Date Brownies have become a cornerstone of our family comfort food. They fill a space where simple, wholesome ingredients meet everyone’s taste buds without the hassle.
My Date Brownies Comfort Hacks:
– Using date paste for that naturally sweet and sticky batter
– Adding cinnamon for warmth that the whole family loves
– Baking just until moist crumbs appear for the perfect chewy texture
We’ve also tried variations like this recipe with walnuts, gluten-free flours, and even vegan dates brownies with coconut oil swaps. My kids appreciate the classic, my husband prefers the less sweet gluten-free date brownies, and I love sneaking in extra fiber with almond meal.
I encourage you to make these Date Brownies your own. Tweak the ingredients, test different mix-ins, and most importantly, enjoy the moment of feeding your family with love and comfort. It’s a comforting win amid all the busy chaos, promising you can manage simple, satisfying meals with a smile.
Serving Date Brownies from my kitchen to yours, here’s to many more cozy moments around your table!
Date Brownies
Delightfully rich and naturally sweet, these Date Brownies combine wholesome dates with cocoa for a deliciously fudgy treat perfect for any dessert craving.
- Prep Time: 10 minutes
- Cook Time: 25 minutes
- Total Time: 35 minutes
- Yield: 9 servings
- Category: Dessert
- Method: Baked
- Cuisine: American
Ingredients
- 1 1/2 cups pitted dates
- 3/4 cup whole wheat flour
- 1/2 cup unsweetened cocoa powder
- 1/2 cup melted coconut oil
- 2 large eggs
- 1/4 cup honey or maple syrup
- 1 teaspoon vanilla extract
- 1/2 teaspoon baking soda
- 1/4 teaspoon salt
Instructions
- Preheat the oven to 350°F (175°C) and lightly grease an 8×8 inch baking pan.
- In a food processor, blend the pitted dates until smooth and sticky.
- In a large bowl, whisk together the flour, cocoa powder, baking soda, and salt.
- In another bowl, combine the melted coconut oil, eggs, honey (or maple syrup), and vanilla extract.
- Mix the wet ingredients into the dry ingredients, then fold in the date paste until fully combined.
- Pour the batter into the prepared pan and spread evenly.
- Bake for 20-25 minutes, or until a toothpick inserted near the center comes out with a few moist crumbs.
- Allow to cool completely before cutting into squares.
Notes
For an extra touch, sprinkle chopped nuts or dark chocolate chips on top before baking for added texture and flavor.