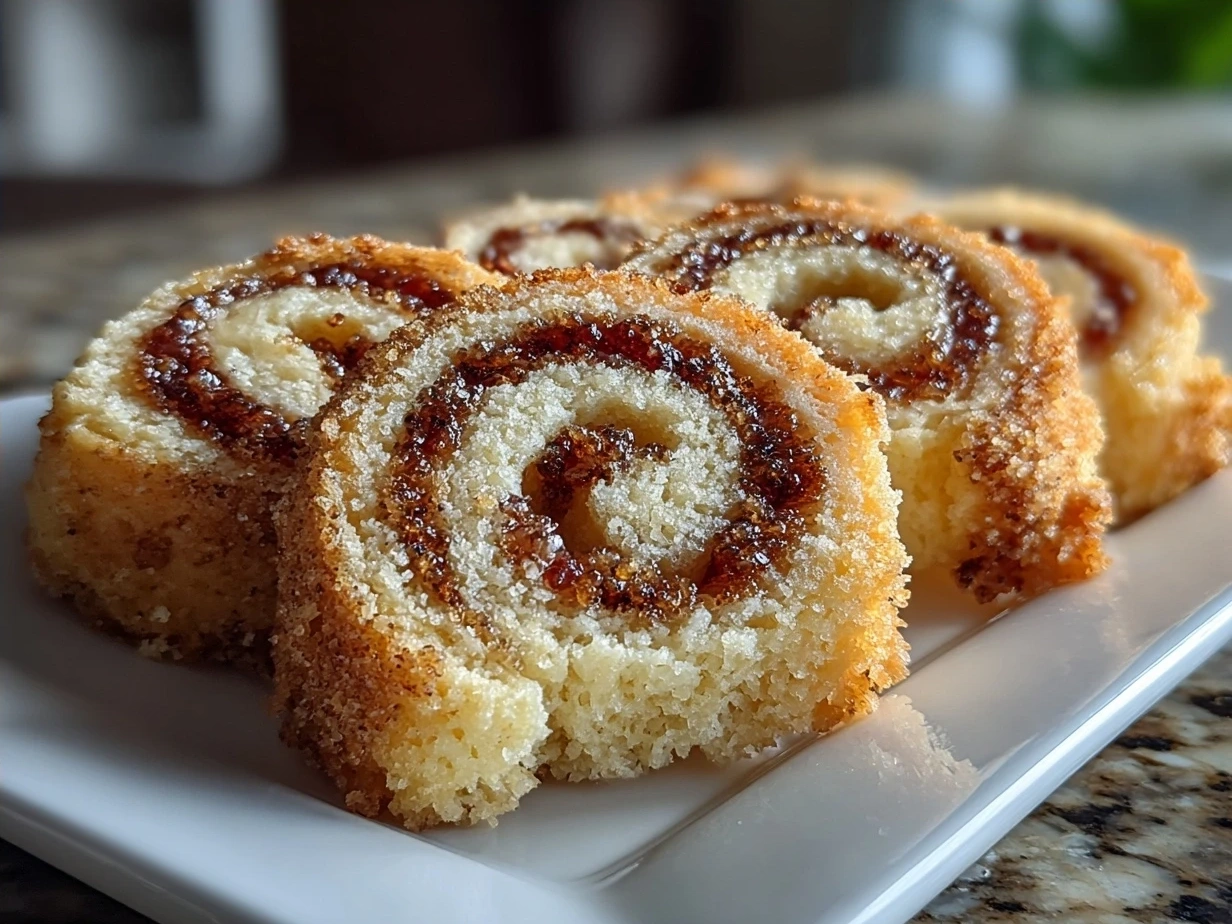
Hey there, fellow comfort seekers! It’s Beatriz from MommiesMore, and today we’re diving headfirst into a holiday baking tradition that’s as fun to make as it is to eat: Christmas Pinwheel Cookies! These aren’t your average cookies; they’re swirls of vanilla and chocolate (or peppermint!), a festive treat that brings a little extra joy to our cozy chaos.
I remember the first time I made Christmas Pinwheel Cookies. My youngest insisted on helping, and we ended up with more flour on the floor than in the dough. But you know what? Those slightly misshapen Christmas Pinwheel Cookies were still devoured with gusto. That’s the magic of homemade comfort food – it’s not about perfection; it’s about love and memories. So, grab your aprons, and let’s get baking! I’m here to share all my tips and tricks for creating Christmas Pinwheel Cookies that will become a family favorite. Let’s embrace the fun together!
INGREDIENTS You’ll Need:
Here’s what you need to make these festive Christmas Pinwheel Cookies:
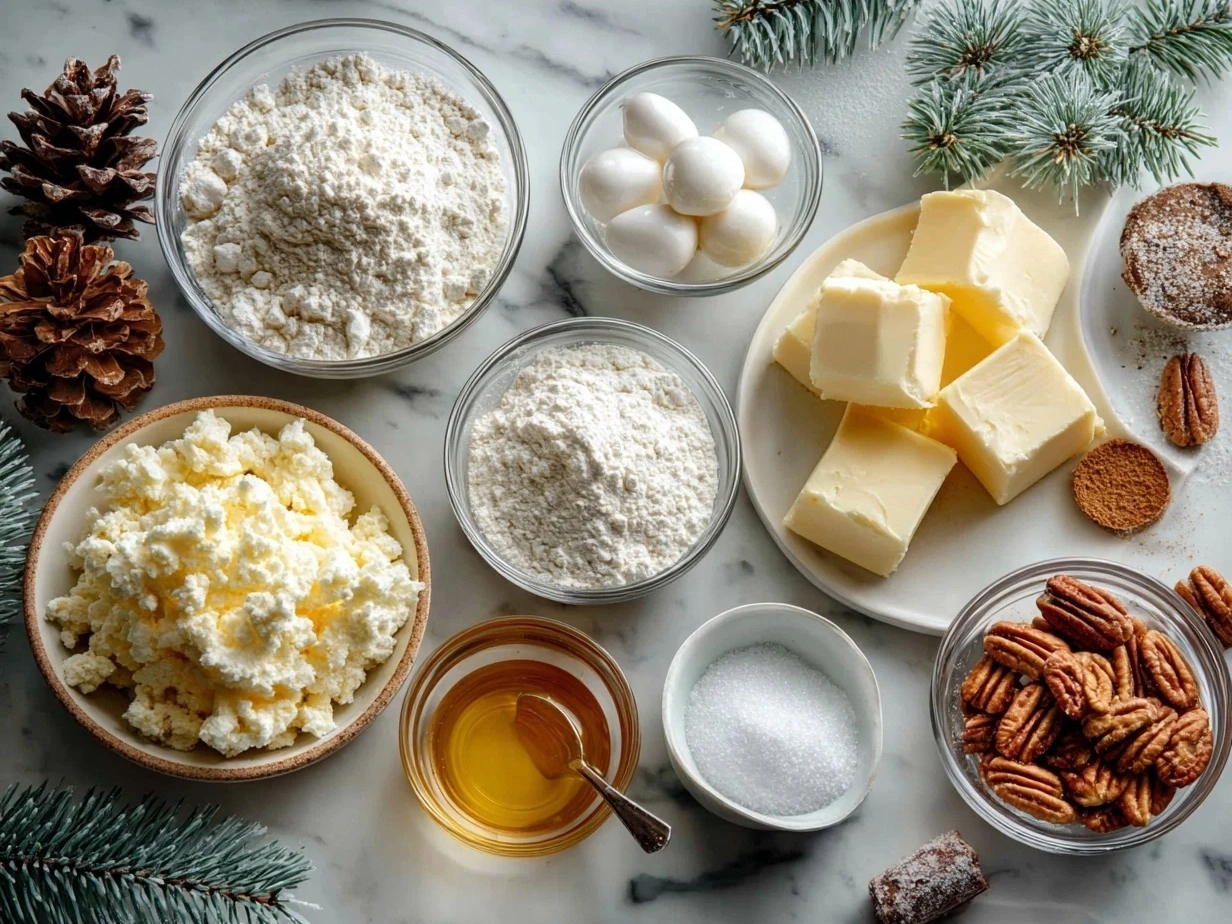
- 3 cups all-purpose flour: This forms the base of our cookies. No worries if you’re short a bit – I’ve used a mix of all-purpose and whole wheat flour for extra flavor in my Christmas Pinwheel Cookies!
- 1 cup (2 sticks) unsalted butter, softened: Make sure it’s nice and soft for easy creaming.
- 1 cup granulated sugar: For that perfect touch of sweetness.
- 1 large egg: This binds everything together.
- 2 teaspoons vanilla extract: Pure vanilla extract is my go-to for that classic vanilla flavor.
- 1/2 teaspoon salt: Balances the sweetness and brings out the other flavors.
- 1/4 cup unsweetened cocoa powder: For the chocolate swirl.
- 1/4 teaspoon peppermint extract (optional): For the peppermint pinwheels.
Trust me, this Christmas Pinwheel Cookies ingredient list is simple because busy moms need comfort without complexity! You can find these simple ingredients at your regular grocery store. My family gets extra comfort when I add a pinch of cinnamon to the vanilla dough; it gives these Christmas Pinwheel Cookies a warm, cozy vibe. This Christmas Pinwheel Cookies proves delicious doesn’t mean expensive, either! For a budget-friendly alternative, you can use margarine instead of butter; just make sure it’s softened.
Let’s Make it Happen!
Ready to get our bake on? Let’s create some Christmas Pinwheel Cookies! Here’s how we make it happen:
- Cream the butter and sugar: In a large bowl, cream together the softened butter and sugar until light and fluffy. This usually takes about 3-5 minutes with an electric mixer. This is where my little helper usually gets to lick the spoon!
- Add the egg and vanilla: Beat in the egg and vanilla extract until well combined.
- Combine dry ingredients: In a separate bowl, whisk together the flour and salt.
- Gradually add dry ingredients to wet ingredients: Slowly add the dry ingredients to the wet ingredients, mixing until just combined. Be careful not to overmix!
- Divide the dough: Divide the dough in half. In one half, mix in the cocoa powder (and peppermint extract if using) until evenly combined.
- Chill the dough: Wrap each dough half in plastic wrap and chill in the refrigerator for at least 1 hour. This is crucial – chilling makes the dough easier to roll out. This is the perfect time to prep tomorrow’s lunch!
- Roll out the dough: On a lightly floured surface, roll out each dough half into a rectangle about 9×12 inches. Try to make them as even as possible. Your Christmas Pinwheel Cookies dough should smell amazing by now!
- Layer the doughs: Carefully place the chocolate dough rectangle on top of the vanilla dough rectangle.
- Roll into a log: Starting from one long end, tightly roll up the dough into a log. Don’t worry if your Christmas Pinwheel Cookies log looks a little wonky – it will still taste amazing!
- Wrap and chill: Wrap the log in plastic wrap and chill in the refrigerator for at least 2 hours, or even overnight. This helps the cookies hold their shape.
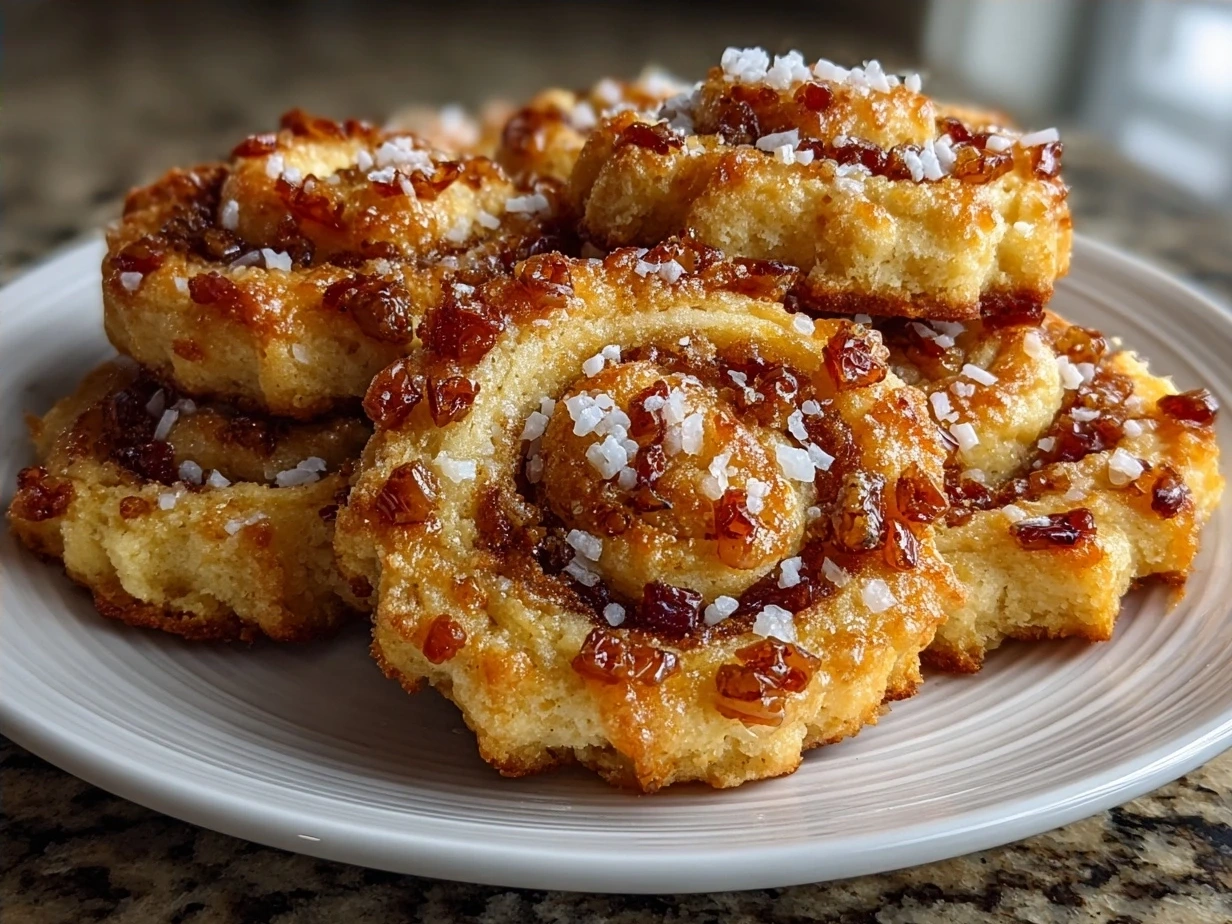
- Slice and bake: Preheat your oven to 350°F (175°C). Slice the log into 1/4-inch thick rounds. Place the Christmas Pinwheel Cookies on ungreased baking sheets.
- Bake: Bake for 8-10 minutes, or until the edges are lightly golden brown.
- Cool: Let the cookies cool on the baking sheets for a few minutes before transferring them to a wire rack to cool completely. While your Christmas Pinwheel Cookies is baking, take a moment to appreciate creating comfort for your family!
Here’s where I used to struggle with my Christmas Pinwheel Cookies – getting the dough too warm. Learn from my experience! Make sure to chill the dough thoroughly for easy slicing and to maintain those beautiful swirls. In my busy kitchen, this comforting Christmas Pinwheel Cookies usually takes about 30 minutes of active time and a few hours of chilling.
How We Love to Eat This!
Our family absolutely loves these Christmas Pinwheel Cookies, and we’ve discovered some fun ways to enjoy them. The kids devour this comforting Christmas Pinwheel Cookies when I serve it with a glass of cold milk. It’s the perfect after-school snack or a sweet treat after dinner. We also love them with a warm cup of cocoa on a chilly evening.
This Christmas Pinwheel Cookies is perfect for those busy weeknights when we need comfort food fast! They’re also great for holiday parties and cookie exchanges. For a fun presentation, I like to arrange them on a festive platter with other holiday treats. One year, I even made mini Christmas Pinwheel Cookies and used them to decorate a gingerbread house! If you want to take these to the next level, give this Christmas Pinwheel Cookies Recipe a peek for some inspiration!
For a seasonal variation, try adding a bit of orange zest to the vanilla dough. It adds a lovely citrusy note that complements the chocolate perfectly. And if you have any leftover cookies (which is rare in our house!), they’re delicious crumbled over ice cream. My guests always rave about how pretty and delicious these festive holiday baking are. Sharing these Christmas Pinwheel Cookies makes my heart full!
FAQs: Your Questions Answered
I know you have questions, so here are some of the most common ones I get from fellow moms about making these Christmas Pinwheel Cookies:
- Is this Christmas Pinwheel Cookies really filling enough for growing kids? Absolutely! While they’re cookies, they do contain enough substance to satisfy those little tummies between meals. I often pair them with a piece of fruit or a small glass of milk.
- What if my picky eater won’t try this Christmas Pinwheel Cookies? Sometimes, presentation is key! Try cutting them into fun shapes or letting your picky eater help with the baking process. Kids are often more willing to try things they’ve helped create.
- Can I meal prep this Christmas Pinwheel Cookies for busy weeks ahead? You sure can! The dough log can be made ahead of time and stored in the refrigerator for up to 3 days or in the freezer for up to 2 months. Just slice and bake when you’re ready for fresh cookies.
- Can I use different extracts to change up the flavor? Absolutely! Almond extract, lemon extract, or even a touch of rum extract can add a unique twist to your Christmas Pinwheel Cookies.
- What’s the best way to store these cookies? Store them in an airtight container at room temperature for up to 5 days. If you want to keep them longer, you can freeze them for up to 2 months.
- Can I make these cookies gluten-free? Yes, you can substitute the all-purpose flour with a gluten-free blend. Just make sure the blend contains xanthan gum for binding.
- Why did my cookies spread too much? This can happen if the butter is too soft or if the dough wasn’t chilled long enough. Make sure your butter is softened but still cool, and always chill the dough thoroughly before baking your holiday swirl cookies.
I’ve learned through trial and error that chilling the dough is non-negotiable. My family’s feedback is always my best guide, and they all agree – a little extra chill time makes all the difference!
Final Thoughts:
These Christmas Pinwheel Cookies are more than just a recipe; they’re a way to create memories and share love with your family. They support my family’s comfort food goals because they’re simple, delicious, and bring everyone together in the kitchen. For a festive treat, check out these Christmas Pinwheel Cookies – Holiday Baking Ideas – Spices N … to spice things up!
My Christmas Pinwheel Cookies Comfort Hacks:
- Chill, chill, chill: Seriously, don’t skip the chilling steps!
- Get the kids involved: Even if it’s just stirring or sprinkling, it makes it more fun.
- Don’t stress about perfection: Imperfect swirls are still delicious.
Family-Tested Christmas Pinwheel Cookies Variations:
- Peppermint Bark: Add crushed peppermint candies to the chocolate dough.
- Orange Cranberry: Add orange zest and dried cranberries to the vanilla dough.
- Nutella Swirl: Spread a thin layer of Nutella between the dough layers before rolling.
My youngest loves the peppermint bark version, while my oldest prefers the classic vanilla chocolate cookies. My husband? He’ll eat them all! I’m excited to try to duplicate the Easy homemade Christmas pinwheel cookies recipe that I saw and adapt it to a recipe my family enjoys!
I encourage you to make this recipe your own way. Add your favorite flavors, experiment with different extracts, and most importantly, have fun! I hope these Christmas Pinwheel Cookies bring joy and sweetness to your family’s holiday season. Remember, simple comfort is the best comfort. And if you’re looking for another comforting cookie recipe, be sure to check out these Twisted Christmas Cookies! If you’re in the mood for something citrusy check out these Christmas Cookies with Orange Juice!
So, go ahead and give these satisfying Christmas Pinwheel Cookies a try. You’ve got this, mama! And remember, it’s not just about the cookies; it’s about the love you bake into them.
\n \n Print
Christmas Pinwheel Cookies
These Christmas Pinwheel Cookies are a festive and fun holiday treat! Swirls of red and green dough create a beautiful and delicious cookie perfect for sharing.
- Prep Time: 30 minutes
- Cook Time: 10 minutes
- Total Time: 40 minutes
- Yield: 36 cookies
- Category: Dessert
- Method: Baked
- Cuisine: American
Ingredients
- 1 cup (2 sticks) unsalted butter, softened
- 1 1/2 cups granulated sugar
- 2 large eggs
- 1 teaspoon vanilla extract
- 3 cups all-purpose flour
- 1 teaspoon baking powder
- 1/2 teaspoon salt
- Red food coloring
- Green food coloring
Instructions
- In a large bowl, cream together the butter and sugar until light and fluffy. Beat in the eggs one at a time, then stir in the vanilla.
- In a separate bowl, whisk together the flour, baking powder, and salt. Gradually add the dry ingredients to the wet ingredients, mixing until just combined.
- Divide the dough in half. In one half, knead in red food coloring until desired color is achieved. In the other half, knead in green food coloring until desired color is achieved.
- Wrap each half of dough in plastic wrap and refrigerate for at least 1 hour.
- On a lightly floured surface, roll out each half of dough into a 12×9 inch rectangle.
- Place the red dough rectangle on top of the green dough rectangle. Gently press together.
- Starting at one long edge, tightly roll up the dough into a log. Wrap the log in plastic wrap and freeze for at least 30 minutes to make slicing easier.
- Preheat oven to 375°F (190°C). Line baking sheets with parchment paper.
- Using a sharp knife, slice the dough log into 1/4-inch thick cookies.
- Place cookies on the prepared baking sheets, about 1 inch apart.
- Bake for 8-10 minutes, or until the edges are lightly golden brown.
- Let cool on baking sheets for a few minutes before transferring to a wire rack to cool completely.
Notes
For extra flavor, add a dash of almond extract to the dough. You can also sprinkle the cookies with coarse sugar before baking for added sparkle.