I still remember the first time I made Baked Salmon Sushi Cups for my family. It was one of those hectic afternoons when I was staring blankly into the fridge, wondering how to please everyone without spending hours in the kitchen. I stumbled upon this idea from a viral recipe online and thought, why not? Little did I know, these Baked Salmon Sushi Cups would quickly become a beloved comfort food staple in our house.
My kids, usually picky about anything fishy, surprised me by gobbling them up with huge smiles. Even my hubby, who’s often more into classic comfort food, gave this seafood sushi bites creation a thumbs-up. What made the Baked Salmon Sushi Cups such a comfort food win was how simple yet satisfying it was. It combined warm, flaky baked salmon with the familiar coziness of rice, all wrapped in this cute little cup shape that made mealtime feel fun instead of chaotic.
Through my cooking journey, I learned how to balance flavors and textures to suit my family’s tastes, even tweaking the baked salmon recipe to be more kid-friendly by dialing down some seasonings. Plus, the way these sushi cup appetizers bring a little hands-on fun to the table adds a nice touch of joy. Fellow busy moms, if you’re craving simple comfort food that feeds your family well without adding stress, I invite you to try these Baked Salmon Sushi Cups. They’ve turned our busy evenings into cozy moments, and I’m sure they’ll do the same for your family.
Ingredients You’ll Need:
Here’s the list for the Baked Salmon Sushi Cups that’s simple and full of comfort:
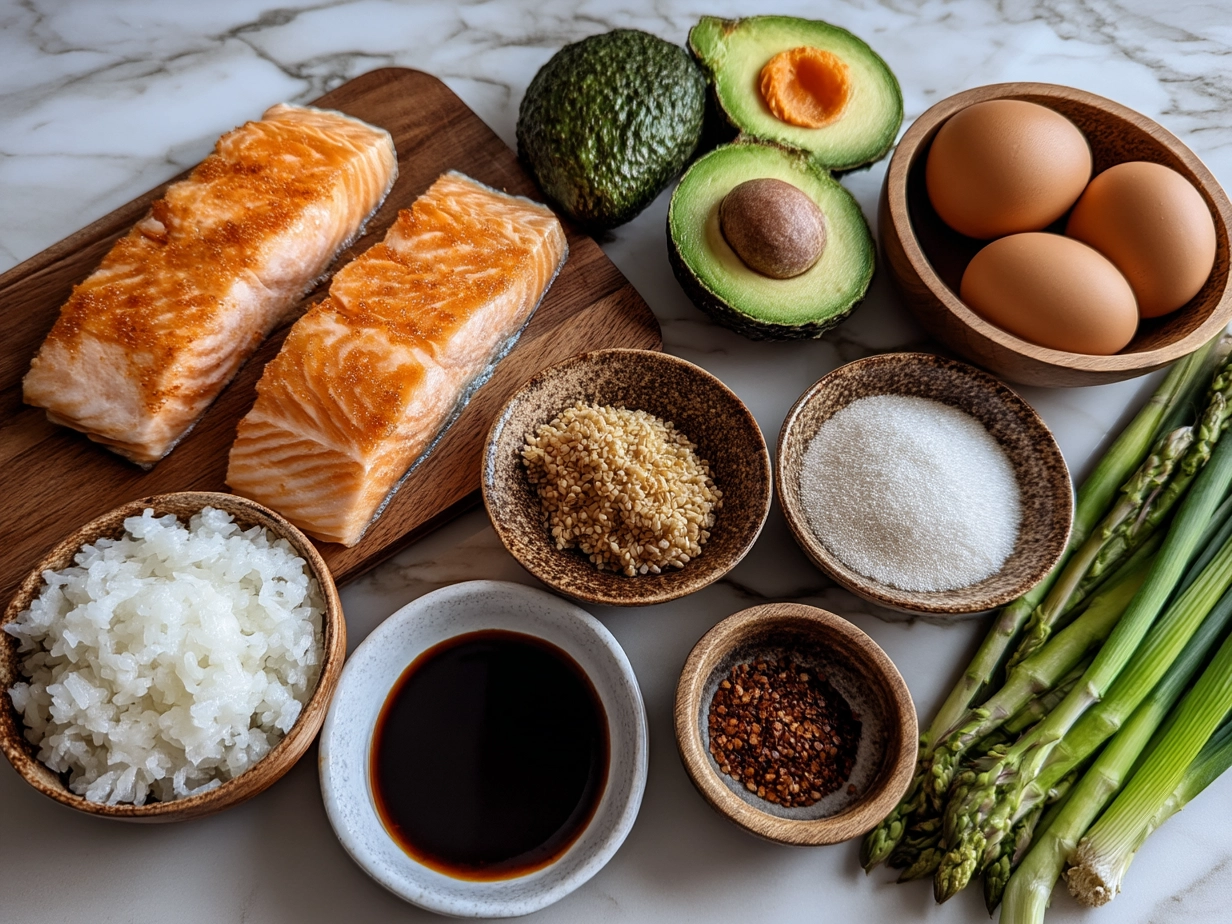
- 1 cup sushi rice (short grain rice works best)
- 2 tablespoons rice vinegar
- 1 tablespoon sugar
- 1 teaspoon salt
- 8 ounces salmon fillet (skin removed)
- 1 tablespoon soy sauce (use low sodium for less salt)
- 1 teaspoon sesame oil
- 1/2 cup shredded cucumber or avocado (for creaminess)
- Nori sheets, cut into small squares for lining cups
- Toasted sesame seeds for garnish
- Optional: a small dollop of cream cheese or Japanese mayo
No worries if you don’t have sushi rice on hand—I’ve used regular short grain rice in a pinch, and it still creates that cozy rice cup sushi feel. When I’m short on fresh salmon, sometimes I grab frozen pieces and bake them right from the freezer, which works like a charm for busy moms.
You’ll find all these simple ingredients at your local grocery store. The basics like rice vinegar and soy sauce are pantry staples for us because they add authentic flavor without fuss. This Baked Salmon Sushi Cups recipe shows you that good food doesn’t mean expensive ingredients or trips to specialty stores.
If you need a comfort hack, adding a little avocado or cream cheese not only boosts flavor but also brings an extra creamy texture that my family loves. These small swaps keep the dish exciting but still easy on busy days.
Let’s Make it Happen!
1. Cook the sushi rice according to package instructions, then mix in rice vinegar, sugar, and salt while still warm. This step brings the classic sushi bowl flavor we all crave.
2. Preheat your oven to 375°F. Place the salmon fillet on a baking sheet lined with foil. Drizzle soy sauce and sesame oil on top. Bake for about 12-15 minutes until flaky. Baking salmon is one of my go-to comfort food secrets—so simple and hands-off!
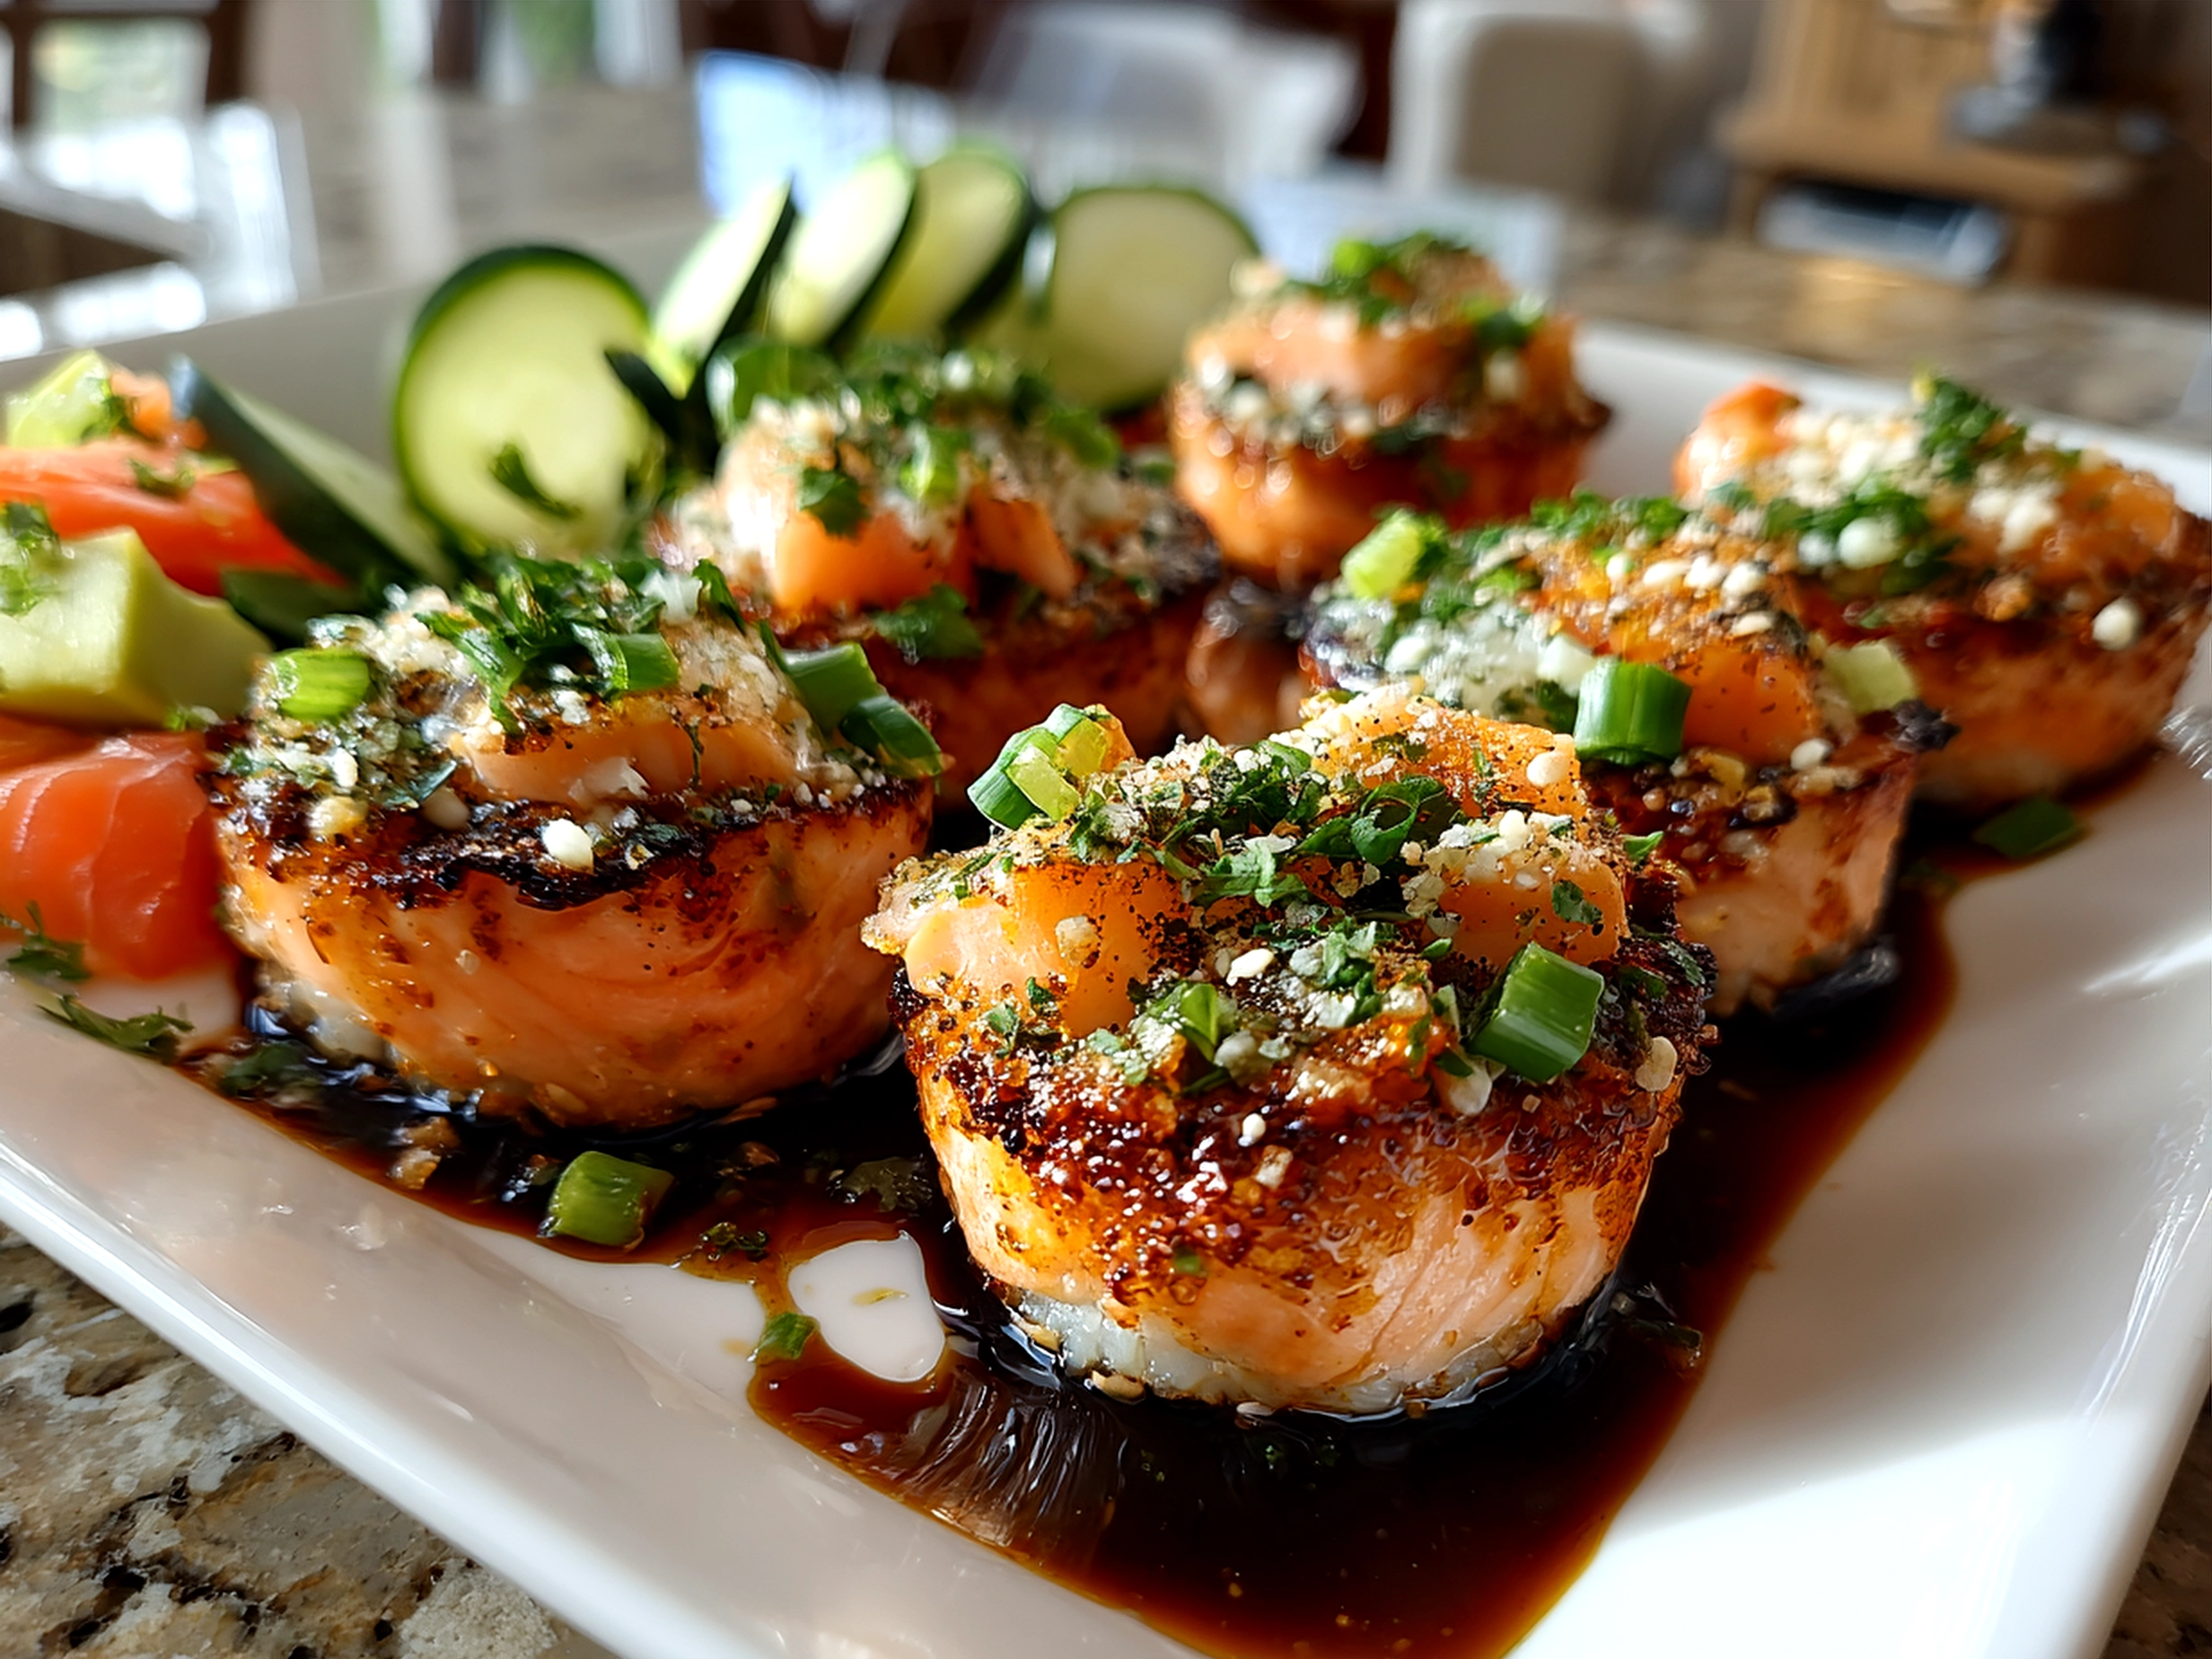
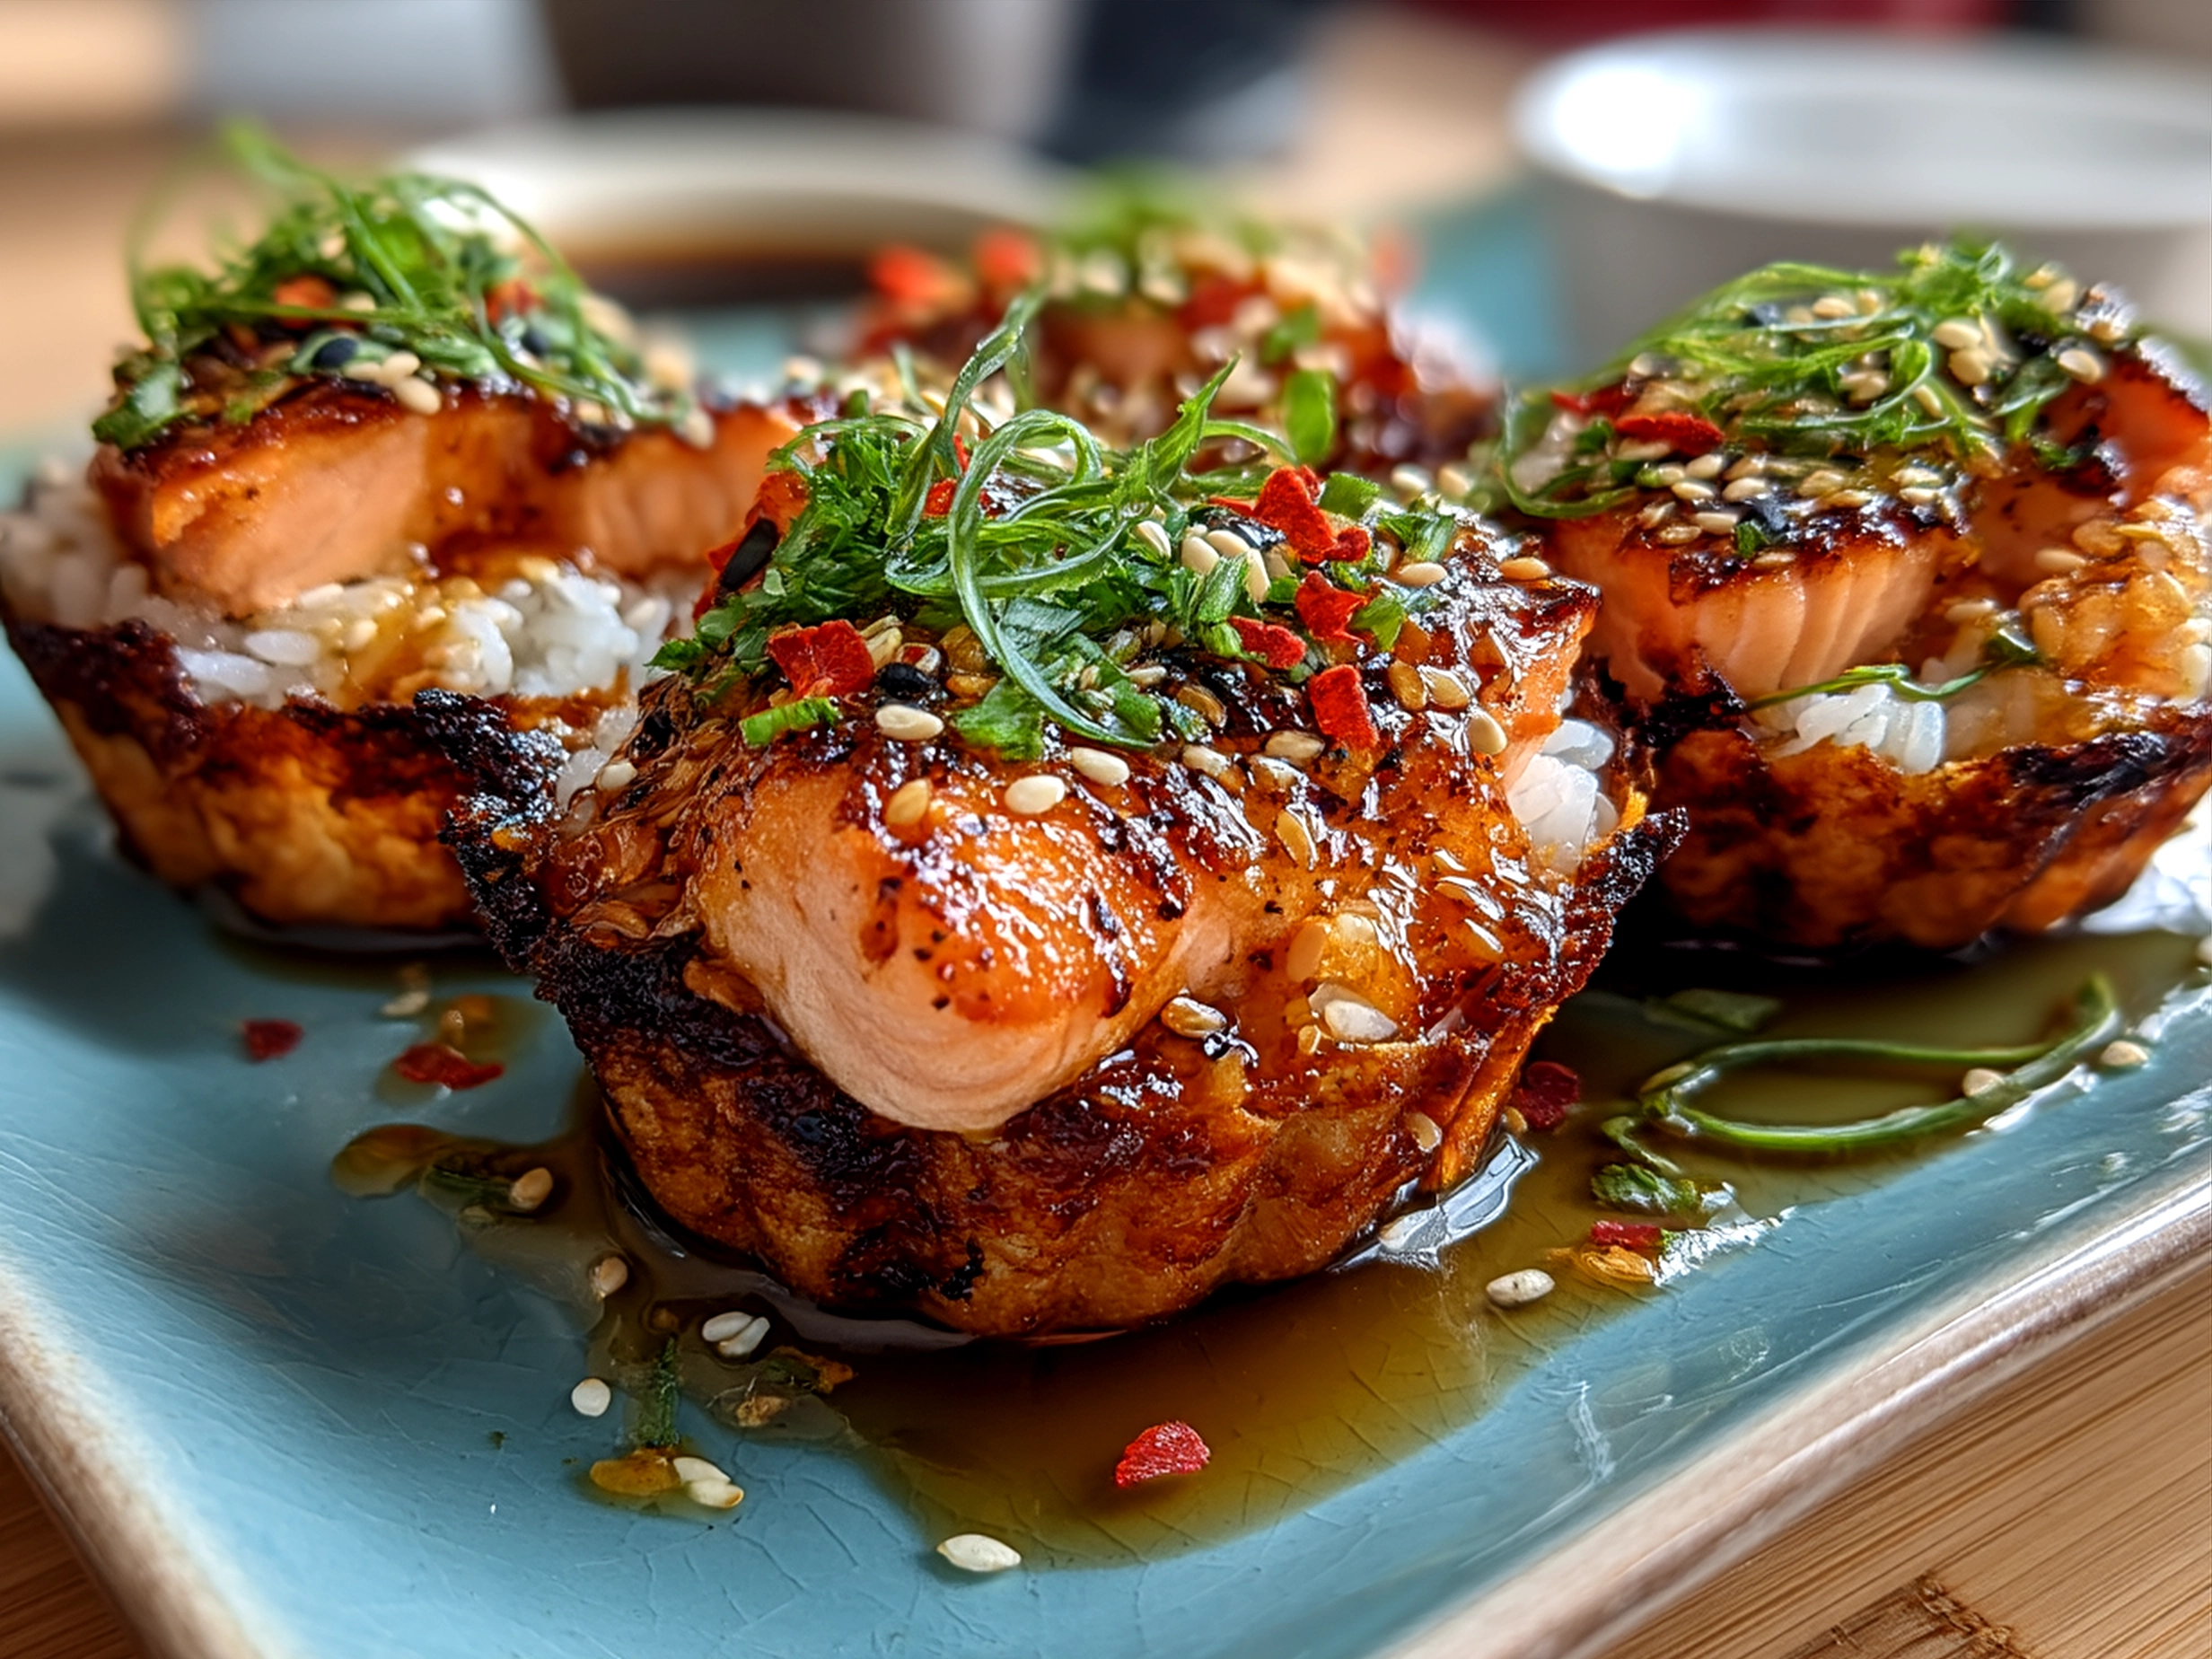
3. While the salmon bakes, prepare the muffin tin. Press the nori squares into each cup, lining them to hold the rice and baked salmon. This creates that perfect sushi cup appetizer shape.
4. Spoon the sushi rice evenly into each nori-lined cup, pressing lightly to form a base. Then, flake the baked salmon and layer it on top of the rice.
5. Add shredded cucumber or avocado to each cup. My kids love to decorate their Baked Salmon Sushi Cups with these seafood sushi bites, which makes eating feel like a game.
6. Finish with a sprinkle of toasted sesame seeds and a dollop of cream cheese or mayo if you like.
7. Bake the cups for another 5 minutes at 350°F to warm everything together before serving.
Your kitchen will smell amazing by now! Don’t worry if your Baked Salmon Sushi Cups look a little rustic—homemade comfort food is supposed to feel cozy, not perfect.
In my busy kitchen, these comforting Baked Salmon Sushi Cups usually take about 40 minutes from start to finish. It’s perfect timing while the salmon cooks to prep tomorrow’s lunchboxes or tidy up the counter.
Here’s a shortcut I love: If I’m short on time, I cook the rice in my instant pot and bake the salmon simultaneously. This double-duty saves precious minutes, leaving more room for family stories during dinner.
How We Love to Eat This!
Our family adores these Baked Salmon Sushi Cups as a light dinner or weekend lunch. The kids especially like dipping them in a little soy sauce or a mix of soy sauce and honey for something sweeter yet still savory.
I usually pair these rice cup sushi treats with simple side dishes like steamed edamame or a crunchy carrot salad. These combinations balance comfort with fun textures and flavors that keep my family coming back for seconds.
This Baked Salmon Sushi Cups dish shines during busy weeknights when we want a satisfying yet quick meal. It also wows guests as a sushi cup appetizer when friends come over for casual gatherings. I’ve served these seafood sushi bites at birthday parties, and they always get rave reviews for both taste and presentation.
Leftovers are a blessing! I store extra Baked Salmon Sushi Cups in airtight containers and warm them up for next-day lunches. Sometimes, I swap out the salmon for leftover cooked shrimp or crab to create new family favorites without extra effort.
Seasonal tweaks like adding fresh mango or using pickled ginger on top add bright, fresh notes that change things up. You can check out more ways to mix up sushi-style meals with recipes like this rice sushi with smoked salmon avocado for similar comforting vibes.
FAQs: Your Questions Answered
Is this Baked Salmon Sushi Cups filling enough for growing kids?
Totally! The combination of protein-rich salmon and satisfying sushi rice makes this dish a hearty meal that fuels my kids’ busy days. Plus, the bite-sized seafood sushi bites keep their interest while eating.
What if my picky eater won’t try this Baked Salmon Sushi Cups?
I get it. Introducing new textures can be tricky. Start by mixing the baked salmon with a bit of cream cheese or mayo to soften flavors. Sometimes serving the rice bowl version helps kids get comfortable before moving to sushi cups. For inspiration, I found that gradual steps work best.
Can I meal prep this Baked Salmon Sushi Cups for busy weeks ahead?
Absolutely! I prep the rice and bake the salmon in advance, then assemble the cups just before serving. It keeps everything fresh and saves dinnertime stress. You might want to hold off baking the assembled cups until just before mealtime to maintain that perfect texture. For more meal prep ideas, check out my easy baked oats recipe for grab-and-go breakfasts.
Can I substitute salmon with other seafood?
Yes, shrimp or crab work wonderfully in these rice cup sushi bites. Keep the baking time similar, adjusting so the seafood cooks through but stays tender.
How spicy is this Baked Salmon Sushi Cups?
Mild by default! If your family loves a kick, sprinkle a tiny bit of chili flakes or sriracha on top. Otherwise, the soy sauce and sesame oil bring enough flavor.
Where did you find this Baked Salmon Sushi Cups recipe?
I saw a popular version on TikTok and refined it for my family’s tastes. You can check out the original viral inspiration from Kalejunkie’s Baked Salmon Sushi Cups for a fun peek.
Are nori sheets necessary?
Not always—sometimes we make the same flavors in a simple baked salmon sushi bowl for easy eating. But the nori adds that classic sushi vibe that kids find fun to hold and eat.
Remember, every family’s comfort food journey is unique, and these Baked Salmon Sushi Cups fit perfectly into mine because of their simplicity and warm flavors.
Final Thoughts:
This Baked Salmon Sushi Cups recipe supports my family’s comfort food goals because it’s simple, nourishing, and fun to make together. My Baked Salmon Sushi Cups Comfort Hacks like using pre-cooked salmon to save time, adding creamy avocado for kid-friendly texture, and baking the assembled cups briefly to warm but not dry out keep dinner stress-free.
We’ve tested variations like spicy mayo drizzle for hubby, extra cucumber for the kids, and even swapping salmon for crab when grocery budgets are tight. Each family member has their favorite twist, making this recipe their own.
I hope these Baked Salmon Sushi Cups bring your family cozy moments, like they do ours. Don’t hesitate to adjust ingredients and presentation to fit your family’s tastes and schedule.
For more simple comfort food ideas, if your kids love these comforting sushi bites, they’ll go crazy for other recipes like this baked mac and cheese recipe or rice sushi with smoked salmon avocado.
Give these Baked Salmon Sushi Cups a go and watch dinner transform into something joyful and satisfying. You’ve got this, fellow comfort seekers!
P.S. For more inspiration and ideas, check out these cozy Baked Salmon Sushi Cups from Lovely Delites, and follow @kalejunkie on Facebook for fresh recipe ideas!
Baked Salmon Sushi Cups

These Baked Salmon Sushi Cups combine tender baked salmon with sushi rice in a fun, handheld form perfect for parties or a healthy snack.
- Prep Time: 20 minutes
- Cook Time: 20 minutes
- Total Time: 40 minutes
- Yield: 6 servings
- Category: Dinner
- Method: Baked
- Cuisine: Japanese
Ingredients
- 2 cups sushi rice
- 2 1/2 cups water
- 1/4 cup rice vinegar
- 2 tablespoons sugar
- 1 teaspoon salt
- 12 oz fresh salmon fillet
- 2 tablespoons soy sauce
- 1 tablespoon sesame oil
- 1 teaspoon grated ginger
- 1/2 avocado, sliced
- 1 sheet nori, cut into small strips
- 1 tablespoon sesame seeds
- Green onions, thinly sliced, for garnish
Instructions
- Preheat oven to 375°F (190°C). Line a baking sheet with parchment paper.
- Place salmon fillet on the sheet, brush with soy sauce, sesame oil, and grated ginger. Bake for 15 minutes or until cooked through. Flake salmon when cooled.
- Rinse sushi rice under cold water until water runs clear. Combine rice and 2 1/2 cups water in a pot. Bring to boil, then simmer covered for 15 minutes. Let rest for 10 minutes.
- In a small bowl, mix rice vinegar, sugar, and salt until dissolved. Gently fold into cooked rice.
- Grease a standard muffin tin. Press a layer of sushi rice into each cup to form a base and sides, creating a small well in the center.
- Fill each rice cup with flaked salmon, a slice of avocado, and sprinkle nori strips and sesame seeds on top.
- Bake assembled cups for an additional 5 minutes to warm through.
- Garnish with sliced green onions and serve immediately.
Notes
For a spicy kick, add a small dollop of sriracha mayo inside each sushi cup before serving.