
Oh, fellow comfort seekers, I have to tell you about the time I made Red Velvet Bear Cookies for the first time. It was one of those hectic afternoons when I was scrambling to find a sweet treat that wouldn’t overwhelm me or the family. I stumbled upon this red velvet cookie recipe that promised to be both soft and festive, and since my kids adore anything bear shaped, I thought, why not give it a whirl?
The kitchen filled with that cozy scent of cocoa and vanilla, and I swear my little ones were hovering nearby, eyes wide at the sight of those cute bear shaped cookies coming out of the oven. The first batch was an absolute hit—they loved the velvety soft cookies with the tangy cream cheese frosting for cookies on top. The sparkle in their eyes made me realize how this simple Red Velvet Bear Cookies recipe could turn into a comforting staple for our family.
This cookie feels like a warm hug in dessert form, perfect for calming the after-school chaos or adding a sweet finish to a busy day. And between you and me, making Red Velvet Bear Cookies became a joyful little ritual—I could tweak the recipe easily and keep everyone happy without any kitchen drama.
If you’re a busy mom like me, juggling all the things but still craving that cozy comfort, I’m inviting you to come along with me on this delicious journey. Together, we’ll get comfy with Red Velvet Bear Cookies, sharing simple wisdom and real kitchen wins so that feeding your family feels like a little moment of calm every day.
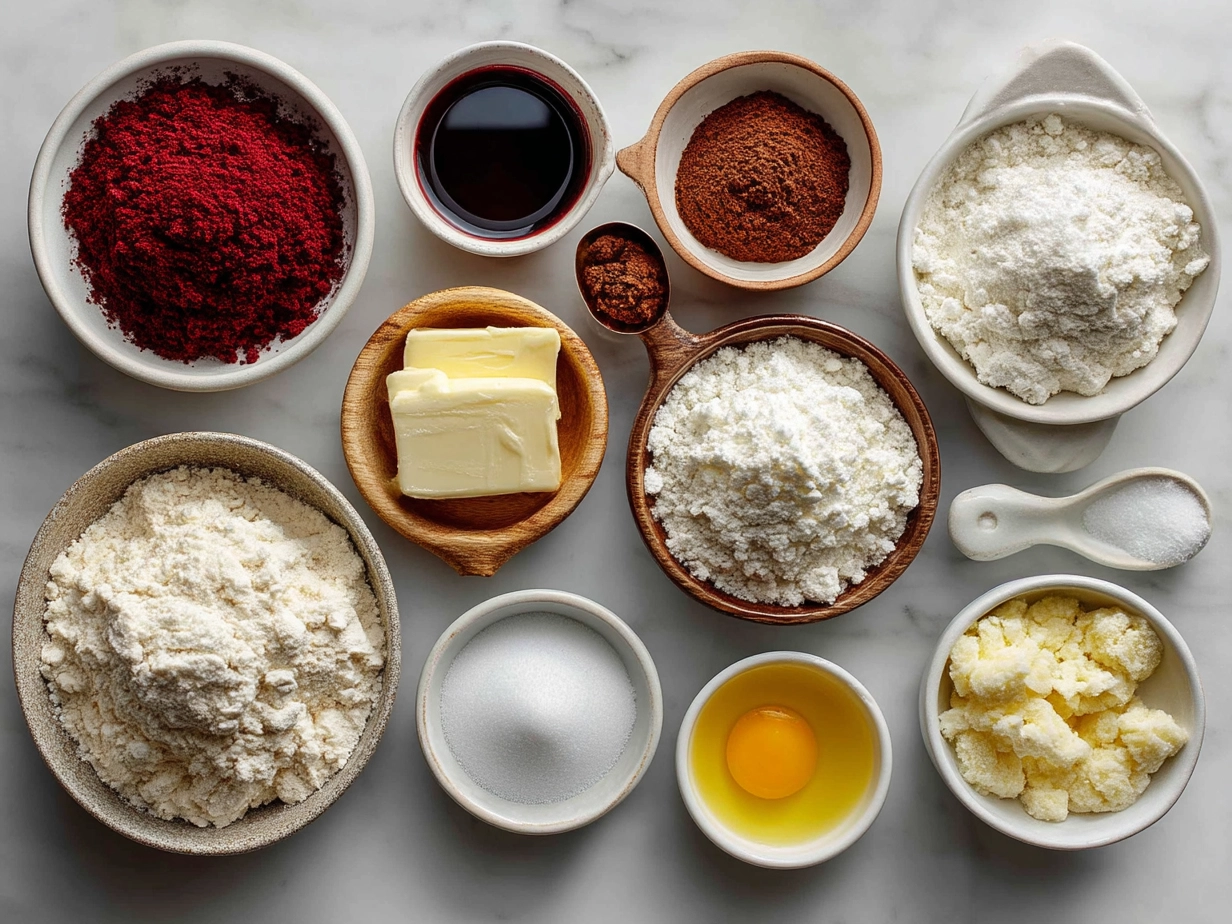
Ingredients You’ll Need:
Here’s the straightforward list to whip up these Red Velvet Bear Cookies without fuss:
- 1 and 1/4 cups all-purpose flour – the base for those velvety soft cookies.
- 1/4 cup cocoa powder (unsweetened) – gives the cookies that classic red velvet depth.
- 1/2 teaspoon baking soda – helps them rise just right.
- 1/4 teaspoon salt – balances the sweetness perfectly.
- 1/2 cup unsalted butter, softened – makes these Red Velvet Bear Cookies tender and buttery.
- 3/4 cup granulated sugar – sweet but not overpowering.
- 1 large egg – binds everything together.
- 1 tablespoon red food coloring – the signature color that makes these bear shaped cookies festive and fun.
- 1 teaspoon vanilla extract – for extra cozy flavor.
For the frosting:
- 4 oz cream cheese, softened – this is the star of the cream cheese frosting for cookies. I find it adds the perfect tanginess.
- 2 tablespoons unsalted butter, softened
- 1 cup powdered sugar
- 1/2 teaspoon vanilla extract
No worries if you don’t have cocoa powder on hand—I sometimes swap it for a bit of melted bittersweet chocolate for extra richness in my Red Velvet Bear Cookies. You can find all these simple ingredients at your regular grocery store, which makes this recipe totally doable. Need a budget-friendly alternative? I’ve used canola oil instead of butter and still gotten soft, cozy cookies that brought smiles all around.
For busy days, soften your butter and cream cheese in advance (sometimes I even microwave for 10 seconds). It’s a small prep hack that saves me from rushing and helps me keep my Red Velvet Bear Cookies smooth and velvety every time.
My family gets extra comfort when I add a pinch of cinnamon to the dough—it warms up the flavor without stealing the show.
Trust me, this ingredient list keeps the kitchen calm and your Red Velvet Bear Cookies comfort high, perfect for moms who want simple but satisfying holiday cookie ideas or any time treats!
Let’s Make it Happen!
- Preheat your oven to 350°F (175°C). Line two baking sheets with parchment paper. This step was a game-changer for me—no sticky cleanup when the Red Velvet Bear Cookies come out soft and ready!
- In a bowl, whisk the flour, cocoa powder, baking soda, and salt. This dry mix is the foundation for those velvety soft cookies. I like to do this early to keep the flow smooth.
- In a large bowl, beat softened butter and sugar until creamy and fluffy. This usually takes about 2-3 minutes with a hand mixer, but you can do this by hand if needed. Your kitchen might smell like a mini bakery at this point!
- Add the egg, vanilla extract, and red food coloring to the butter mixture. Beat until combined—if your little one wants to help, this is a fun step! The dough will be a rich, bright red that’s simply gorgeous.
- Slowly add the dry ingredients to the wet ones, mixing gently until just combined. Be careful not to overmix; you want to keep those cookies tender and soft.
- Roll out the dough on a floured surface to about 1/4 inch thick. Use your favorite bear shaped cookie cutters and place the cutouts on your prepared baking sheets, giving them a little space to spread.
- Bake for 8-10 minutes. Keep a close eye—the cookies should look set but still soft in the middle when you pull them from the oven. Your kitchen will smell amazing by now, like a cozy hug in cookie form.
- While baking, prep your cream cheese frosting for cookies by beating cream cheese, butter, powdered sugar, and vanilla together until smooth and fluffy. Perfect time to prep tomorrow’s lunch or have a quick cup of coffee.
- Cool your Red Velvet Bear Cookies completely before frosting. This step ensures your luscious cream cheese frosting for cookies won’t melt or run.
- Frost and decorate as you like! My kids love putting sprinkles on theirs, making the decorating part a sweet family moment.
I used to struggle with the dough sticking too much until I learned to chill it briefly before rolling. Also, if your Red Velvet Bear Cookies look a little flat, try not to worry—they’re meant to be velvety soft, and that cozy texture steals the show.
For more Red Velvet Bear Cookies inspiration, check out this lovely red velvet cookie recipe with cream cheese frosting that I found online and adapted for my family. It really helped me master the balance between soft and sweet.
How We Love to Eat This!
Our family dives into these Red Velvet Bear Cookies with joy! The kids especially love them after school alongside a tall glass of cold milk—it’s the classic comfort combo that never disappoints.
Sometimes, we serve these bear shaped cookies for holiday cookie ideas—they add such a festive touch that friends always ask for the recipe. I find pairing these velvety soft cookies with something savory makes dinnertime wins easier, like cheese or nuts if you want a grown-up snack version.
For presentation, I like to arrange the Red Velvet Bear Cookies on a pretty platter lined with festive napkins. It’s amazing how a simple touch turns the cookies into a charming centerpiece.
Leftovers? Oh yes, they’re perfect the next day with a cup of tea or lunchbox treat. I often package a few with a note for the kids’ school friends—they always get rave reviews!
If you want to shake things up seasonally, try adding peppermint extract for a winter twist or a little orange zest in the frosting—that freshens the flavor and keeps the cookies exciting all year round.
Our guests have been wowed by these Red Velvet Bear Cookies, calling them both adorable and delicious. If your kids love this hearty recipe, they’ll go crazy for similar goodies I share on MommiesMore too!
FAQs: Your Questions Answered
Is this Red Velvet Bear Cookies filling enough for growing kids?
Totally! The rich butter and cream cheese frosting for cookies add enough substance to curb hungry bellies, but I usually pair it with fruit or nuts for a balanced snack.
What if my picky eater won’t try this Red Velvet Bear Cookies?
Try making the cookies without the red food coloring first—sometimes kids resist new colors. Also, I’ve found that involving them in decorating gets them excited to taste the cookies afterward.
Can I meal prep this Red Velvet Bear Cookies for busy weeks ahead?
Absolutely. These cookies freeze well—freeze unfrosted cookies in airtight containers, then thaw and frost as needed. Makes for quick after-school comfort food!
Can I make these without eggs?
You can! A reader shared her success with an eggless Red Velvet Cookies Recipe, making mini bear shaped cookies perfect for little hands.
Do you have tips for making cream cheese frosting for cookies smoother?
Yes! Make sure your cream cheese and butter are softened to room temperature. Beat them well before adding powdered sugar, and sift your sugar beforehand to avoid lumps.
Are these cookies suitable for holiday celebrations?
Definitely! They fit right in with holiday cookie ideas and look adorable on cookie trays. For more festive treats, peek at an easy holiday bread recipe I love for your gatherings.
What’s the secret to keeping the cookies so soft?
Don’t overbake! The moment your Red Velvet Bear Cookies look set but still soft in the center is the perfect window. Also, chilling the dough helps keep them from spreading too thin.
If you’re curious about other comforting cookie options, check out these Halloween crinkle cookies, a fun seasonal twist your family might adore.
Final Thoughts:
This Red Velvet Bear Cookies recipe has become a cornerstone in my family’s comfort food goals because it strikes the perfect balance of ease, flavor, and warmth. My Red Velvet Bear Cookies comfort hacks? Chill the dough before rolling, always use softened cream cheese for the frosting, and don’t overbake to keep that velvety softness.
We’ve also played with family-tested variations—sometimes I swap cream cheese frosting for a simple powdered sugar glaze for a lighter touch. My little one prefers the classic creamy version, while my husband sometimes sneaks in extra cocoa for richness. We even tried a mini cookie batch without food coloring as a birthday surprise!
I encourage you, fellow comfort seekers, to make these Red Velvet Bear Cookies your own. Try adjusting flavors or decorating styles that fit your family’s vibe. My hope is they bring the same cozy calm and smiles to your kitchen table as they do to mine.
And if you want some more delicious comfort food to fill your recipe box, stop by MommiesMore’s red velvet sugar cookies or peek into some gothic cake inspiration with this blackberry velvet gothic cake that’s a mood for cozy days.
Remember, feeding your family well can be a source of joy, not stress. These Red Velvet Bear Cookies are a sweet ally in your cozy chaos, making mealtime and snack time little moments of love and comfort. Cheers to you and your beautiful, busy family!
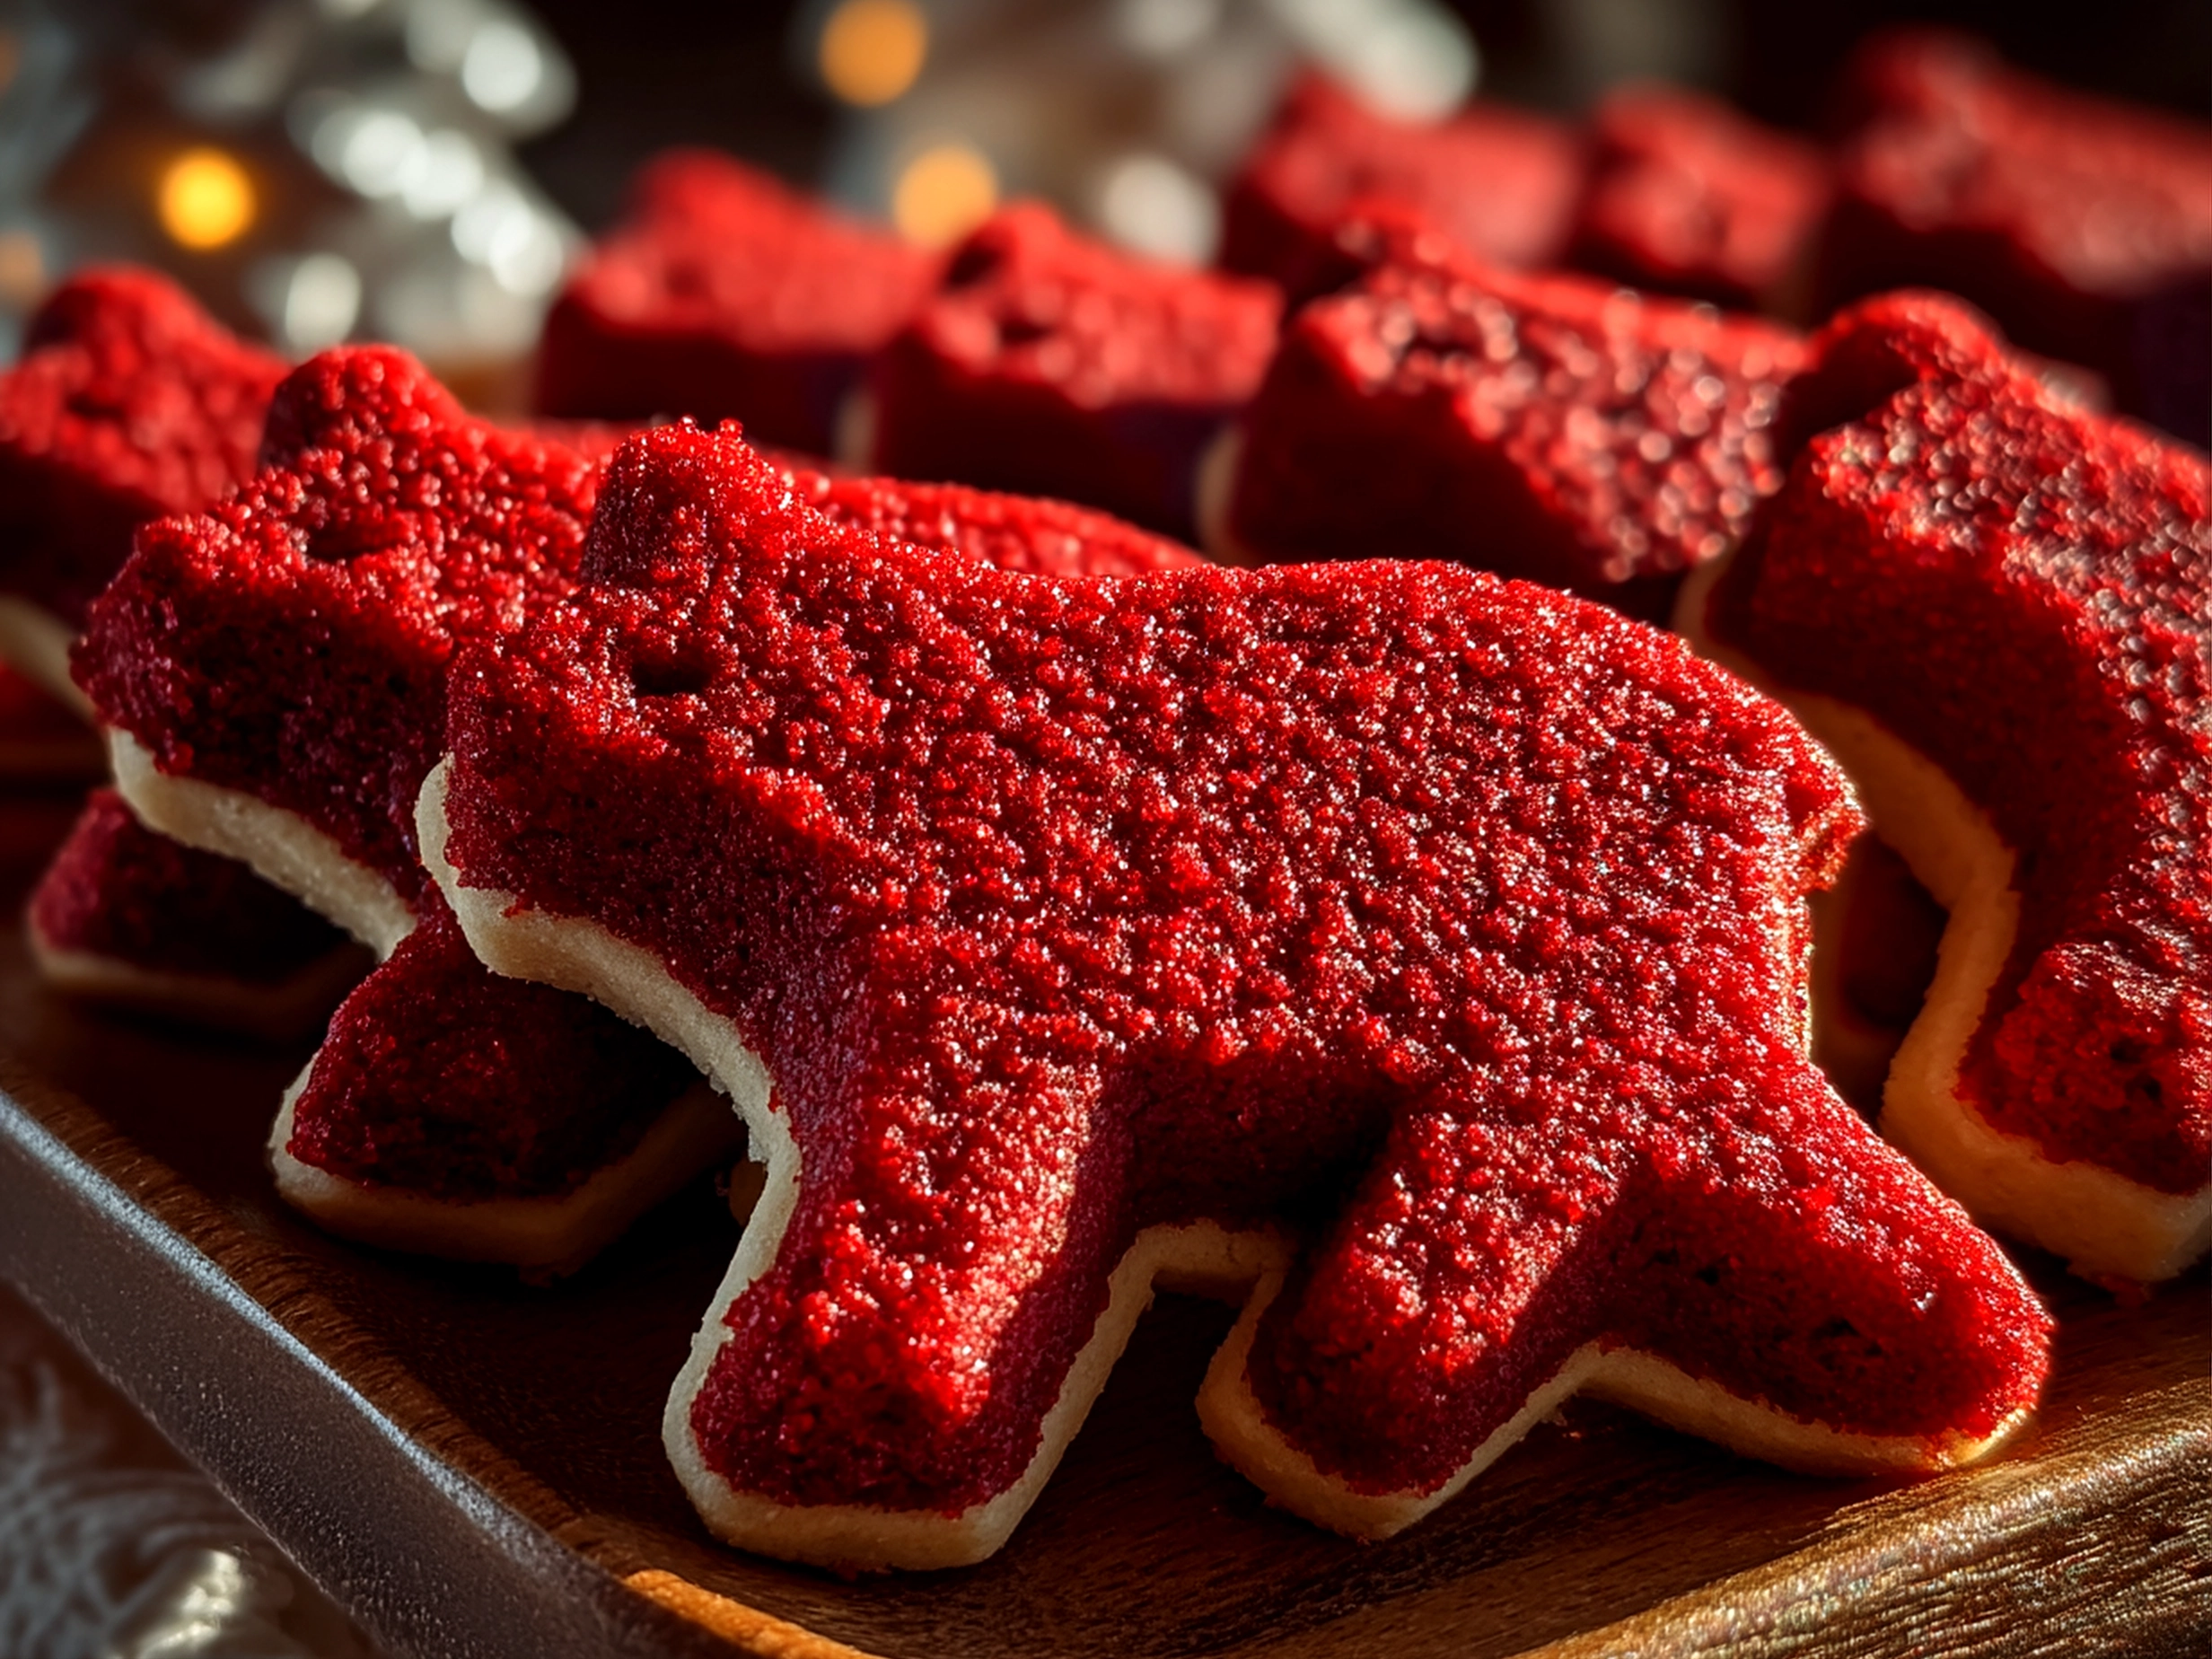
Red Velvet Bear Cookies
Delight in these charming Red Velvet Bear Cookies, combining classic red velvet flavor with a soft, buttery texture and adorable bear shapes perfect for any occasion.
- Prep Time: 20 minutes
- Cook Time: 12 minutes
- Total Time: 32 minutes
- Yield: 24 cookies
- Category: Dessert
- Method: Baked
- Cuisine: American
Ingredients
- 2 1/2 cups all-purpose flour
- 1/4 cup unsweetened cocoa powder
- 1 teaspoon baking soda
- 1/2 teaspoon salt
- 1 cup unsalted butter, softened
- 1 1/4 cups granulated sugar
- 1 large egg
- 2 tablespoons red food coloring
- 1 teaspoon vanilla extract
- 1/2 cup buttermilk
- 1 teaspoon white vinegar
- For decorating: mini chocolate chips or edible eyes
Instructions
- Preheat the oven to 350°F (175°C) and line baking sheets with parchment paper.
- In a medium bowl, sift together flour, cocoa powder, baking soda, and salt. Set aside.
- In a large bowl, cream the softened butter and sugar together until light and fluffy.
- Add the egg, red food coloring, and vanilla extract to the butter mixture and beat until well combined.
- Mix in the vinegar and buttermilk alternately with the dry ingredients, beginning and ending with the dry ingredients, mixing until just combined.
- Roll the dough out on a floured surface to about 1/4 inch thick.
- Use a bear-shaped cookie cutter to cut out cookies and place them on the prepared baking sheets.
- Decorate each cookie with mini chocolate chips or edible eyes to create the bear’s face.
- Bake for 10-12 minutes or until the edges are set but cookies remain soft.
- Allow cookies to cool on the baking sheet for 5 minutes before transferring to a wire rack to cool completely.
Notes
For a festive touch, drizzle white chocolate over the cooled cookies or use cream cheese frosting to add cute details to the bears.