
Apple Cider Whoopie Pies: A Fall Baking Delight
Okay, here we go! Let’s chat about a fall favorite that’s become a total win in my house: Apple Cider Whoopie Pies. This is one of those treats that makes everyone happy, from the little ones to the grown-ups. We all need a little comfort, right? This recipe is a simple way to bake up some smiles and cozy up to fall flavors without spending hours in the kitchen.
I remember the first time I made Apple Cider Whoopie Pies. My daughter, Lily, had a friend over, and I wanted to bake something special but didn’t have a ton of time. I found a recipe for cider spiced cookies, tweaked it a bit to make it my own, and the rest is history! The kids devoured them, and my husband declared them a “dinnertime win”. Now, I’m sharing my little secret with you, fellow busy moms!
Creating Apple Cider Whoopie Pies has been a real comfort food journey. I’ve learned a few tricks along the way, like how to get the perfect soft cookie texture and how to make the cream cheese filling extra dreamy. I am so excited to share this Apple Cider dessert with you! So, if you’re looking for a simple, comforting way to treat your family this season, keep reading! This is sanity-saving comfort food at its finest, and I can’t wait to share it with you.
INGREDIENTS You’ll Need
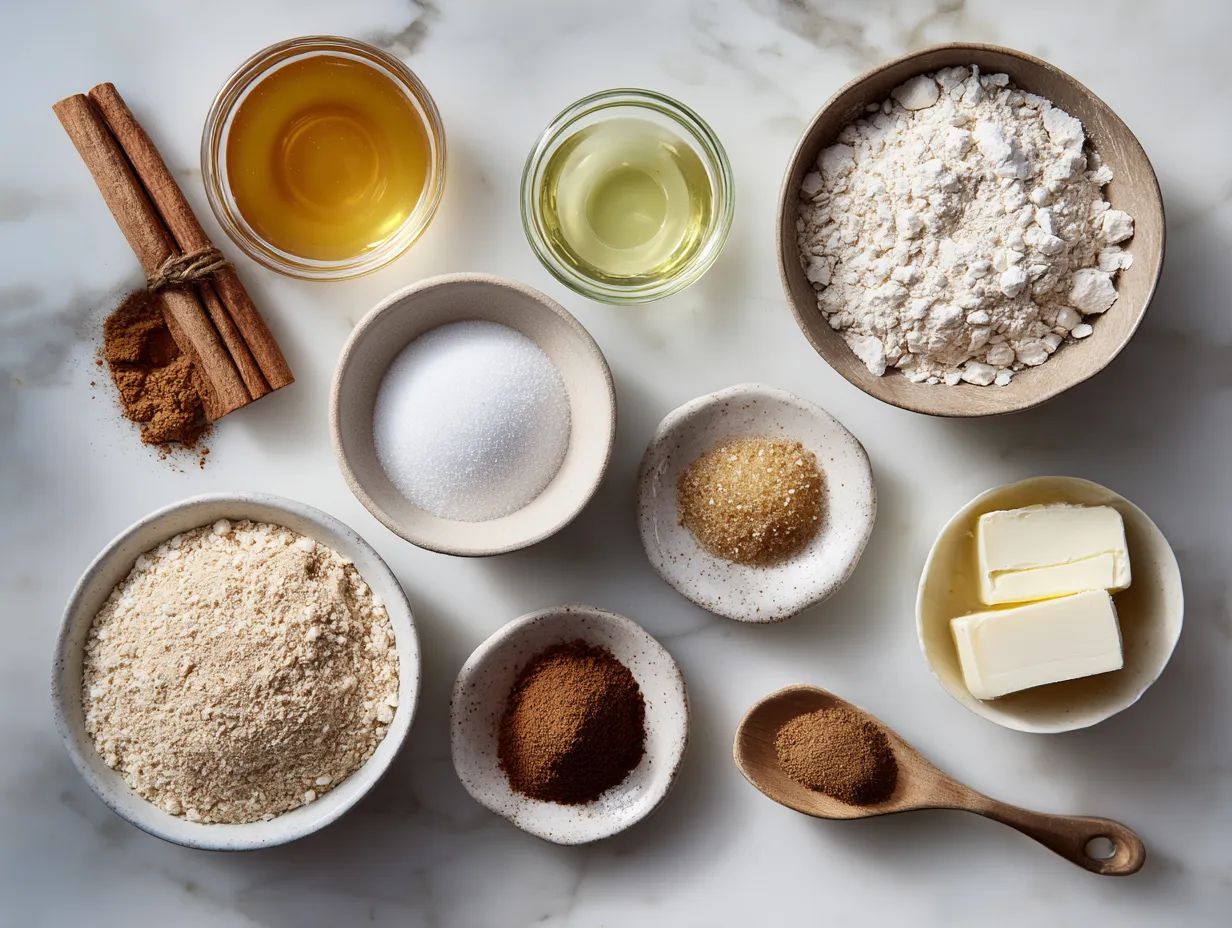
Here’s what you’ll need for these irresistible Apple Cider Whoopie Pies. Trust me, the ingredient list is simple because busy moms need comfort without complexity!
- 2 1/2 cups all-purpose flour
- 1 teaspoon baking soda
- 1 teaspoon ground cinnamon
- 1/2 teaspoon ground nutmeg
- 1/4 teaspoon ground cloves
- 1/2 teaspoon salt
- 1 cup (2 sticks) unsalted butter, softened
- 1 cup granulated sugar
- 1/2 cup packed brown sugar
- 2 large eggs
- 1 cup apple cider, reduced to 1/4 cup (see instructions below)
- 1 teaspoon vanilla extract
For the Cream Cheese Filling:
- 8 ounces cream cheese, softened
- 1/2 cup (1 stick) unsalted butter, softened
- 3 cups powdered sugar
- 1 teaspoon vanilla extract
For extra comfort and fall flavor, I sometimes add a tablespoon of apple pie spice to the batter. My family gets extra comfort when I add a pinch of sea salt to the cream cheese filling. It balances the sweetness perfectly! You can find these simple ingredients at your regular grocery store. This Apple Cider dessert proves delicious doesn’t mean expensive, which is a huge win for us moms on a budget.
Apple Cider Comfort Hack: To reduce the apple cider, simply simmer 1 cup of cider in a small saucepan over medium heat until it reduces to 1/4 cup. This concentrates the apple flavor and adds a wonderful depth to the cider spiced cookies! No worries if you don’t have nutmeg – I use extra cinnamon for added comfort in my Apple Cider Whoopie Pies.
Let’s Make it Happen!
Let’s get baking these yummy Apple Cider Whoopie Pies! These instructions are written like we’re cooking together, so grab your apron, and let’s get started!
- First, preheat your oven to 375°F (190°C). Line two baking sheets with parchment paper. In my busy kitchen, this Apple Cider Whoopie Pies baking process usually takes about 30 minutes of prep, then a bit of baking time.
- In a medium bowl, whisk together the flour, baking soda, cinnamon, nutmeg, cloves, and salt. This ensures all the spices are evenly distributed for maximum flavor.
- In a large bowl, cream together the softened butter, granulated sugar, and brown sugar until light and fluffy. I use an electric mixer for this, but you can also do it by hand.
- Beat in the eggs one at a time, then stir in the reduced apple cider and vanilla extract. Don’t worry if your batter looks slightly curdled at this point – it will all come together.
- Gradually add the dry ingredients to the wet ingredients, mixing until just combined. Be careful not to overmix the batter, as this can make the cider spiced cookies tough.
- Drop rounded tablespoons of batter onto the prepared baking sheets, leaving about 2 inches between each cookie. They will spread a bit as they bake. Perfect time to prep tomorrow’s lunch while these bake!
- Bake for 8-10 minutes, or until the edges are lightly golden brown and the centers are set. Your Apple Cider Whoopie Pies should smell amazing by now!
- Let the cookies cool on the baking sheets for a few minutes before transferring them to a wire rack to cool completely.
- While the cookies are cooling, make the cream cheese filling: In a large bowl, beat together the softened cream cheese and butter until smooth and creamy. Add the powdered sugar and vanilla extract and beat until light and fluffy.
- Once the cookies are completely cool, spread the cream cheese filling on the flat side of one cookie and top with another cookie to form a sandwich. Here’s where I used to struggle with my Apple Cider Whoopie Pies – learn from my experience, and make sure those cookies are COMPLETELY cool before adding the filling!
How We Love to Eat This!
This Apple Cider Whoopie Pies recipe is a HUGE hit in my house, and I’m excited to share how we love to enjoy them!
The kids devour these fall whoopie pies when I serve them with a glass of cold milk. I usually put them on a pretty plate for a special snack. We’ve even made a tradition of having them during family movie night in the fall! They are perfect for those cozy nights in! I sometimes pair them with apple slices. The crispness of the apple is a great contrast to the soft, spiced cookies.
This Apple Cider Whoopie Pies is perfect for those busy weeknights when we need comfort food fast! My friends always rave about these when I bring them to potlucks. One time, I made a double batch for a school bake sale, and they were gone in minutes!
I’ve even experimented with seasonal variations. Last Christmas, I added a hint of gingerbread spice to the batter and used a cinnamon cream cheese filling. So good! For more simple comfort food ideas for busy families, check out Halloween Whoopie Pies.
FAQs: Your Questions Answered
Here are some common questions I get from fellow moms about making Apple Cider Whoopie Pies. I’m answering them like I’m helping you right in my own kitchen!
- Is this Apple Cider dessert really filling enough for growing kids? Absolutely! The combination of the cookies and cream cheese filling provides a good balance of carbs, fat, and protein to keep them satisfied.
- What if my picky eater won’t try these fall whoopie pies? Try letting them help you bake! Kids are often more willing to try things they’ve helped create. You can also cut the Apple Cider Whoopie Pies into smaller sizes or decorate them with sprinkles to make them more appealing.
- Can I meal prep these Apple Cider Whoopie Pies for busy weeks ahead? Yes, you can! The cookies can be baked ahead of time and stored in an airtight container at room temperature for up to 3 days. The cream cheese filling can also be made ahead of time and stored in the refrigerator for up to 2 days. Assemble the Apple Cider Whoopie Pies just before serving.
- Can I freeze these Apple Cider Whoopie Pies? Yes, you can freeze the baked cookies. Let them cool completely, then wrap them tightly in plastic wrap and store them in a freezer bag for up to 2 months. Thaw at room temperature before filling. I don’t recommend freezing the filled Apple Cider Whoopie Pies, as the cream cheese filling may change texture.
- What can I use if I don’t have apple cider? You can substitute apple juice, but the flavor won’t be as intense. If you use apple juice, I recommend adding a teaspoon of apple cider vinegar to the batter to give it a bit of tang.
- Can I make these Apple Cider Whoopie Pies gluten-free? Yes! Simply substitute a gluten-free all-purpose flour blend for the regular flour. Be sure to use a blend that contains xanthan gum for best results.
- How do I keep the cream cheese filling from being too runny? Make sure your cream cheese and butter are softened to room temperature before beating them together. Also, don’t overbeat the filling, as this can cause it to become runny.
These Apple Cider Whoopie Pies remind me of another family favorite. Also, for more autumn baking recipes, check out this recipe by My Incredible Recipes, Apple Cider Whoopie Pies.
Final Thoughts:
These Apple Cider Whoopie Pies support my family’s comfort food goals by providing a delicious, homemade treat that’s perfect for any occasion. They’re easy to make, use simple ingredients, and bring a touch of fall magic to our kitchen.
My Apple Cider Whoopie Pies Comfort Hacks:
- Use a cookie scoop to ensure uniform cookie sizes, which helps with even baking and makes the whoopie pies look more professional.
- Don’t skip reducing the apple cider. It concentrates the flavor and makes a HUGE difference.
- Let the cookies cool completely before filling. Trust me, this will prevent the cream cheese filling from melting and sliding off.
Here are some family-tested Apple Cider Whoopie Pies variations:
- Caramel Apple Whoopie Pies: Drizzle the cream cheese filling with caramel sauce before adding the top cookie.
- Chocolate Chip Apple Whoopie Pies: Add 1/2 cup of chocolate chips to the cookie batter.
- Cinnamon Roll Apple Whoopie Pies: Add a swirl of cinnamon sugar to the cream cheese filling.
My daughter, Lily, prefers the Caramel Apple version, while my husband loves the classic Apple Cider Whoopie Pies. My son, Ben, is a fan of the Chocolate Chip version. Encourage readers to make it their own way! Add your favorite spices, use different fillings, or decorate them with sprinkles. The possibilities are endless!
I hope these Apple Cider Whoopie Pies bring your family as much joy and comfort as they bring mine. Remember, cooking is about creating memories and sharing love through food. So, get in the kitchen, have fun, and don’t be afraid to experiment. And if you’re looking for more fun ways to enjoy Apples, check out this Apple Cider Whoopie Pies with cream cheese frosting.
These are such a fun treat! You might also enjoy these Ghost Mini Taco Pies as well. For information about selling whoopie pies, here is a Can apple cider donut whoopie pies sell in November and December? I know you can master these Apple Cider Whoopie Pies! Happy Baking!

Apple Cider Whoopie Pies

These Apple Cider Whoopie Pies are soft, spiced cake-like cookies filled with a creamy maple frosting. A perfect fall treat bursting with apple cider flavor!
- Prep Time: 20 minutes
- Cook Time: 10 minutes
- Total Time: 30 minutes
- Yield: 12 whoopie pies
- Category: Dessert
- Method: Baked
- Cuisine: American
Ingredients
- For the Whoopie Pies:
- 2 1/2 cups all-purpose flour
- 1 teaspoon baking soda
- 1 teaspoon ground cinnamon
- 1/2 teaspoon ground nutmeg
- 1/4 teaspoon ground cloves
- 1/2 teaspoon salt
- 1 cup (2 sticks) unsalted butter, softened
- 1 1/2 cups granulated sugar
- 2 large eggs
- 1 teaspoon vanilla extract
- 1 cup apple cider, reduced to 1/4 cup
- For the Maple Cream Filling:
- 1 cup (2 sticks) unsalted butter, softened
- 4 cups powdered sugar
- 1/4 cup maple syrup
- 2 tablespoons milk
- 1 teaspoon vanilla extract
Instructions
- Make the Whoopie Pies: Preheat oven to 375°F (190°C). Line baking sheets with parchment paper.
- In a medium bowl, whisk together flour, baking soda, cinnamon, nutmeg, cloves, and salt.
- In a large bowl, cream together butter and sugar until light and fluffy. Beat in eggs one at a time, then stir in vanilla extract.
- Gradually add the dry ingredients to the wet ingredients, alternating with the reduced apple cider, beginning and ending with the dry ingredients. Mix until just combined.
- Drop rounded tablespoons of batter onto prepared baking sheets, leaving about 2 inches between each.
- Bake for 8-10 minutes, or until edges are lightly golden. Let cool on baking sheets for a few minutes before transferring to a wire rack to cool completely.
- Make the Maple Cream Filling: In a large bowl, cream together butter and powdered sugar until light and fluffy.
- Beat in maple syrup, milk, and vanilla extract until smooth.
- Assemble the Whoopie Pies: Spread a generous amount of maple cream filling on the flat side of one whoopie pie. Top with another whoopie pie, flat side down.
- Repeat with remaining whoopie pies and filling.
- Serve immediately or store in an airtight container in the refrigerator.
Notes
For a richer apple flavor, try adding 1/2 teaspoon of apple pie spice to the batter. Serve chilled for best results!